There’s something special about waking up to the smell of fresh coffee while you’re camping. If you want to make that perfect cup, a camping coffee percolator is your best friend.
But maybe you’ve never used one before, or you’re not sure how to get the most out of it. Don’t worry—you’re in the right place. This guide will show you exactly how to use your camping coffee percolator step by step, so you can enjoy rich, delicious coffee no matter where you are.
Keep reading, and soon you’ll be brewing like a pro on your next outdoor adventure.
Choosing The Right Percolator
Choosing the right camping coffee percolator makes your outdoor coffee experience better. A good percolator brews tasty coffee and suits your camping style. It needs to be easy to use and carry. Consider the type, material, and size before buying. These factors help you pick the best fit for your trip.
Types Of Camping Percolators
Camping percolators come in three main types: stovetop, electric, and air percolators. Stovetop percolators work on a camp stove or fire. They are simple and classic. Electric percolators need a power source, good for RV camping. Air percolators use pressure and air but are less common. Choose the type that matches your camping setup.
Material Considerations
Materials affect the percolator’s weight and durability. Stainless steel is strong, rust-resistant, and easy to clean. Aluminum is lighter but less durable and can affect taste. Enamel-coated percolators look nice but chip easily. Pick a material that lasts and fits your weight needs.
Size And Capacity
Size matters for how much coffee you want to make. Small percolators make 1-2 cups, perfect for solo camping. Medium sizes brew 4-6 cups for small groups. Large percolators handle 8 or more cups for big gatherings. Choose a size that matches your group to avoid waste or too little coffee.

Credit: www.youtube.com
Essential Supplies
Having the right supplies makes camping coffee percolator use simple and fun. Good ingredients and tools help brew tasty coffee outdoors. Knowing what to bring saves time and avoids frustration. Here are the essential supplies for a perfect cup of camp coffee.
Coffee Grounds Selection
Choose medium-coarse coffee grounds for the best taste. Fine grounds can make coffee bitter and clog the percolator. Avoid very coarse grounds as they may cause weak flavor. Fresh coffee grounds give the richest aroma. Pack enough coffee for all campers to enjoy.
Water Quality Tips
Use clean, fresh water for brewing coffee. Avoid using water with strong smells or tastes. Filtered or bottled water works well if the campsite water is poor. Cold water heats more evenly in the percolator. Carry extra water to ensure enough for brewing and drinking.
Additional Gear Needed
Bring a camping stove or fire source to heat the percolator. A heat-resistant glove helps handle the hot pot safely. A scoop measures the right amount of coffee grounds. A mug or cup lets you enjoy your fresh brew right away. A small brush or cloth keeps the percolator clean after use.
Preparing The Percolator
Preparing the percolator is the first step to brewing great camping coffee. Clean parts and proper assembly ensure the best flavor. Taking time here saves trouble later.
Cleaning Before Use
Rinse the percolator with warm water before each use. This removes dust and leftover residue. Avoid soap, as it can leave a taste. Wipe the inside and outside with a clean cloth. Make sure all parts are dry before assembling.
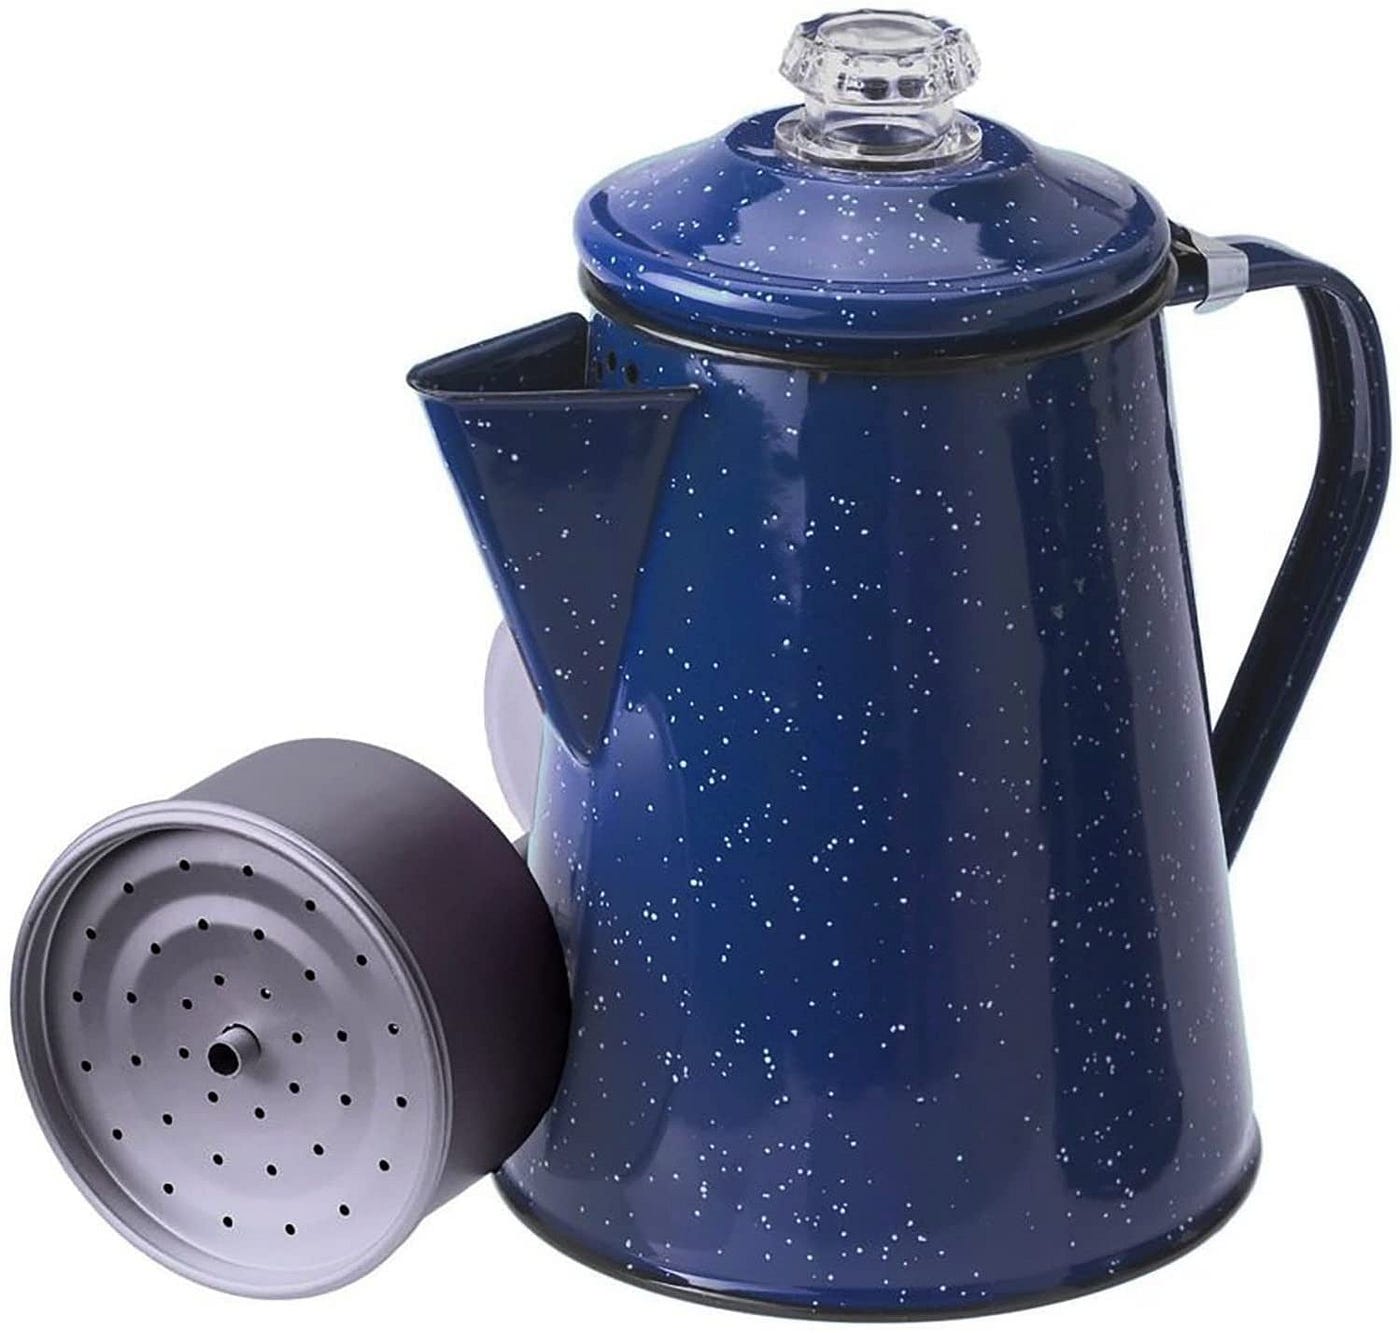
Assembling Parts Correctly
Place the bottom chamber on a flat surface. Insert the coffee basket into the chamber. Fill the basket with your ground coffee. Put the stem through the basket’s hole. Attach the top lid tightly to prevent spills. Check all parts fit snugly for safe brewing.
Brewing Steps
Brewing coffee with a camping coffee percolator is simple and rewarding. Follow clear steps to make fresh coffee outdoors. Each step helps you get the best flavor and avoid mistakes.
Measuring Coffee And Water
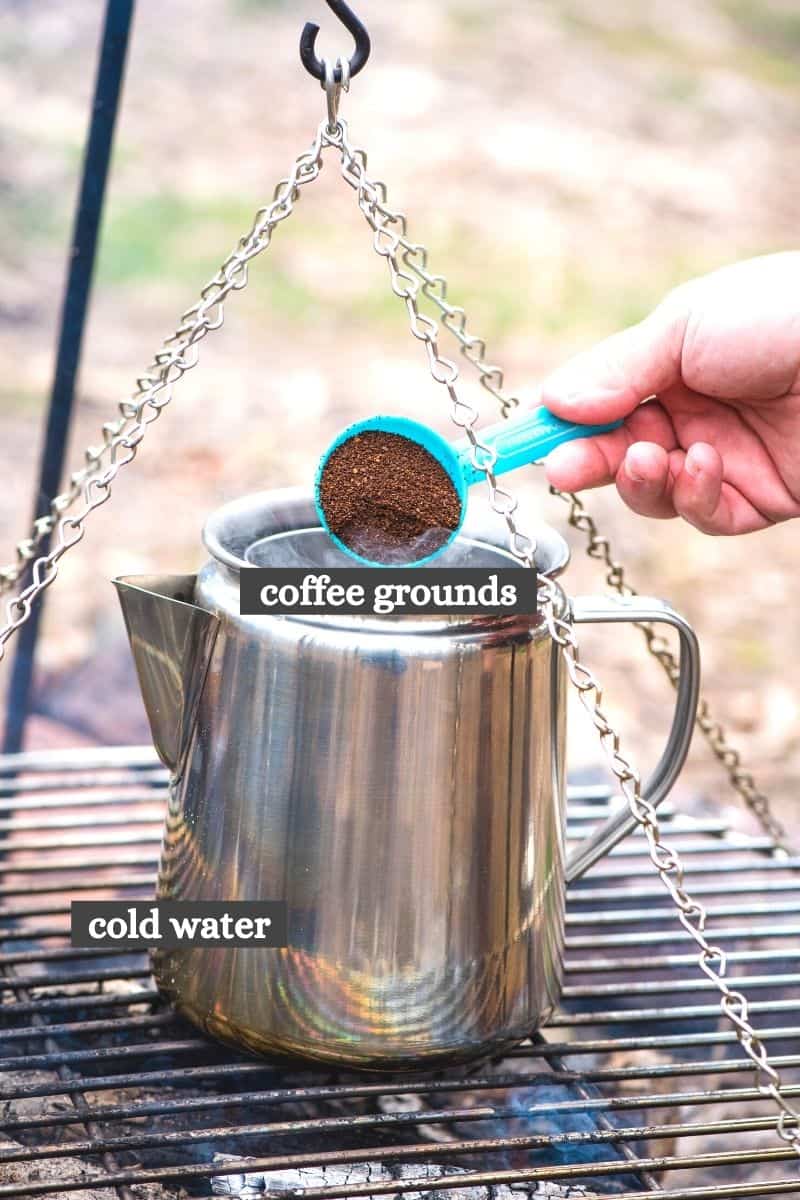
Start by measuring the water. Use the percolator’s water chamber. Fill it with cold water up to the desired level.
Next, measure the coffee grounds. Use a medium grind for best results. Place the coffee in the basket or filter inside the percolator.
Use about one tablespoon of coffee per cup of water. Adjust based on how strong you like your coffee.
Setting Up The Heat Source
Place the percolator on a camping stove or a safe campfire spot. Use low to medium heat. High heat can burn the coffee or damage the percolator.
Make sure the percolator sits stable and does not tip over. Heat evenly for a smooth brew.
Monitoring The Brewing Process
Watch the percolator closely. You will see bubbles and steam inside the glass knob on top. This shows the water is boiling and moving through the coffee grounds.
Let it percolate for about 5 to 7 minutes. Avoid over brewing to prevent bitter taste.
Turn off the heat when done. Let the coffee sit for a minute before pouring.
Serving Your Coffee
Serving coffee made with a camping coffee percolator is a simple joy. It brings warmth and comfort to your outdoor experience. Pouring your coffee correctly helps keep its rich taste and aroma. Small steps can make your coffee time special in nature.
Pouring Techniques
Pour slowly to avoid splashes and spills. Hold your cup close to the spout. This reduces air and keeps coffee hot. Tilt the cup slightly as you pour. Fill it to your preferred level, but leave space to avoid spills.
Use a steady hand to keep coffee smooth. Pouring too fast can cause overflow. If the coffee is too strong, add hot water after pouring. This balances the taste without losing flavor.
Enhancing Flavor Outdoors
Add a pinch of cinnamon or nutmeg for warmth. These spices blend well with coffee’s natural taste. Use fresh cream or milk to soften bitterness. Sugar or honey can add sweetness if you like.
Serve coffee in insulated cups to keep it warm longer. A small snack like a biscuit or fruit pairs well. Enjoying coffee slowly helps you savor the outdoor calm. The right serving makes your camping coffee even better.
Credit: medium.com
Cleaning And Maintenance
Cleaning and caring for your camping coffee percolator keeps it working well. Regular maintenance stops buildup and rust. It also helps your coffee taste fresh every time.
Post-brew Cleaning
After brewing, let the percolator cool down. Empty leftover coffee and grounds. Rinse all parts with warm water. Use a soft brush to clean the filter basket. Avoid soap on the inside to keep the flavor pure. Dry every part thoroughly before reassembling.
Storage Tips For Longevity
Store your percolator in a dry place. Keep it open or loosely covered to avoid moisture. Check for any leftover water before storing. Clean it again if you plan to store it long. Use a cloth bag or box to protect from dust and scratches.
Troubleshooting Common Issues
Troubleshooting common issues with your camping coffee percolator helps improve your coffee experience. Simple fixes can save time and avoid frustration. Understanding basic problems makes your outdoor coffee brewing smooth and enjoyable.
Weak Coffee Solutions
Weak coffee often means not enough coffee grounds. Use more coffee to strengthen the flavor. Check the grind size; coarse grounds work best for percolators. Make sure water reaches the coffee basket fully. Avoid boiling water too fast; gentle heat is better. Let the percolator brew long enough for full flavor.
Over-extraction Fixes
Bitter coffee usually means over-extraction. Reduce brewing time by lowering the heat. Use medium grind coffee to prevent bitterness. Avoid too much coffee in the basket. Check that the water level is correct and not too high. Stop brewing once the coffee turns dark and rich.
Handling Percolator Malfunctions
Percolator malfunctions can stop brewing or cause leaks. Tighten all parts to avoid leaks. Clean the percolator regularly to prevent blockages. Check the filter basket for damage or clogging. Replace worn or broken parts quickly. Ensure the percolator sits flat on the heat source for even brewing.
Credit: adventuresofmel.com
Frequently Asked Questions
How Do I Use A Camping Coffee Percolator?
To use a camping coffee percolator, fill it with water and add ground coffee to the basket. Heat the percolator over a campfire or stove until coffee percolates. Remove from heat and let it brew for a few minutes before serving.
What Grind Size Is Best For Percolator Coffee?
Use a medium-coarse grind for percolator coffee. It prevents over-extraction and reduces bitterness. Avoid fine grounds, as they can clog the filter and make coffee muddy.
How Long Should I Percolate Camping Coffee?
Percolate coffee for about 5 to 7 minutes. Brewing too long causes bitterness, while too short results in weak coffee. Adjust time based on heat and personal taste.
Can I Use A Camping Coffee Percolator On A Campfire?
Yes, you can use a camping coffee percolator on a campfire. Place it on hot coals or a grill grate. Make sure to monitor heat to avoid burning coffee.
Conclusion
Using a camping coffee percolator makes fresh coffee outdoors simple. Just follow the steps to brew your favorite cup. Clean the percolator well to keep it working great. Enjoy warm, tasty coffee after a long day outside. Take time to practice before your trip for best results.
A good cup of coffee can boost your camping experience. Try different coffee grounds to find what you like. Keep your gear ready for every adventure. Happy camping and enjoy your coffee moments!