
When you imagine a perfect evening under the stars, the warm glow of a campfire is almost always there. But for many campers, the fire is more than just a source of warmth or light—it’s the heart of outdoor cooking. Whether you’re roasting marshmallows, grilling steaks, or simmering chili, having the right campfire cooking equipment makes all the difference. This guide dives deep into the tools, tips, and ideas for making your next outdoor meal a success, even if you’re new to campfire cooking or hoping to upgrade your setup.
Why Campfire Cooking Is Special
Cooking over a campfire is not just about preparing food. It’s about connection—with nature, with friends and family, and with the simple joys of creating meals from scratch. The process is slower, the flavors richer, and the experience often more memorable than cooking indoors.
But it’s also more challenging. You need to handle changing heat, unpredictable weather, and limited resources. The right equipment helps you overcome these challenges and enjoy delicious meals wherever you camp.
Types Of Campfire Cooking Equipment
You’ll find a wide range of tools for campfire cooking, but not all are necessary for every trip. The best choices depend on your group size, menu, and style of camping. Let’s explore the main categories:
Pots And Pans For Campfire Cooking
Classic campfire pots and pans are made to handle direct flame and uneven heat. They come in several materials:
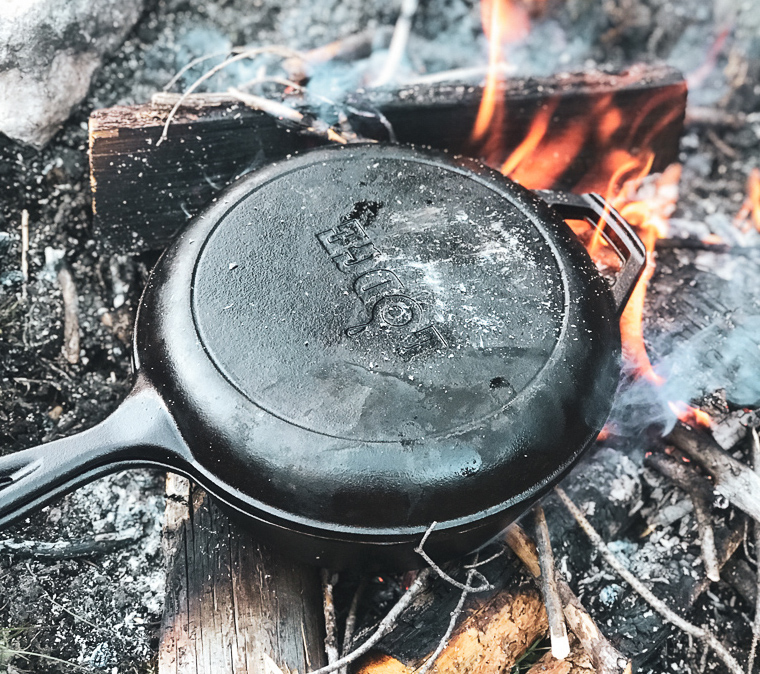
- Cast Iron Skillets: Famous for durability and even heating. Great for frying, baking, and sautéing. A 12-inch skillet is ideal for most campsites.
- Dutch Ovens: Heavy, lidded pots perfect for stews, baking bread, or making cobblers. Look for a model with legs and a flat lid for placing coals on top.
- Steel and Aluminum Pots: Lightweight and easy to carry. Good for boiling water or soups but less durable than cast iron.
- Griddles: Flat surfaces for pancakes, bacon, or tortillas. Cast iron griddles are popular because they hold heat well.
Non-obvious tip: Cast iron cookware needs seasoning. Before your trip, rub oil on the surface and bake it to prevent rust and sticking.
Grills And Grates
A grill or grate lets you cook directly over the fire or coals. Here’s what to consider:
- Portable Campfire Grills: Foldable metal grills that sit above the fire. Choose one with adjustable height for more control.
- Grill Grates: Simple metal grids. Place them over rocks or logs to create a cooking surface.
- Tripod Grills: Three-legged frames that suspend a grill or pot over the fire. Useful for uneven terrain.
Non-obvious insight: A grill grate with a mesh pattern helps prevent small foods from falling into the fire.
Cooking Tools And Accessories
Small tools make campfire cooking easier and safer:
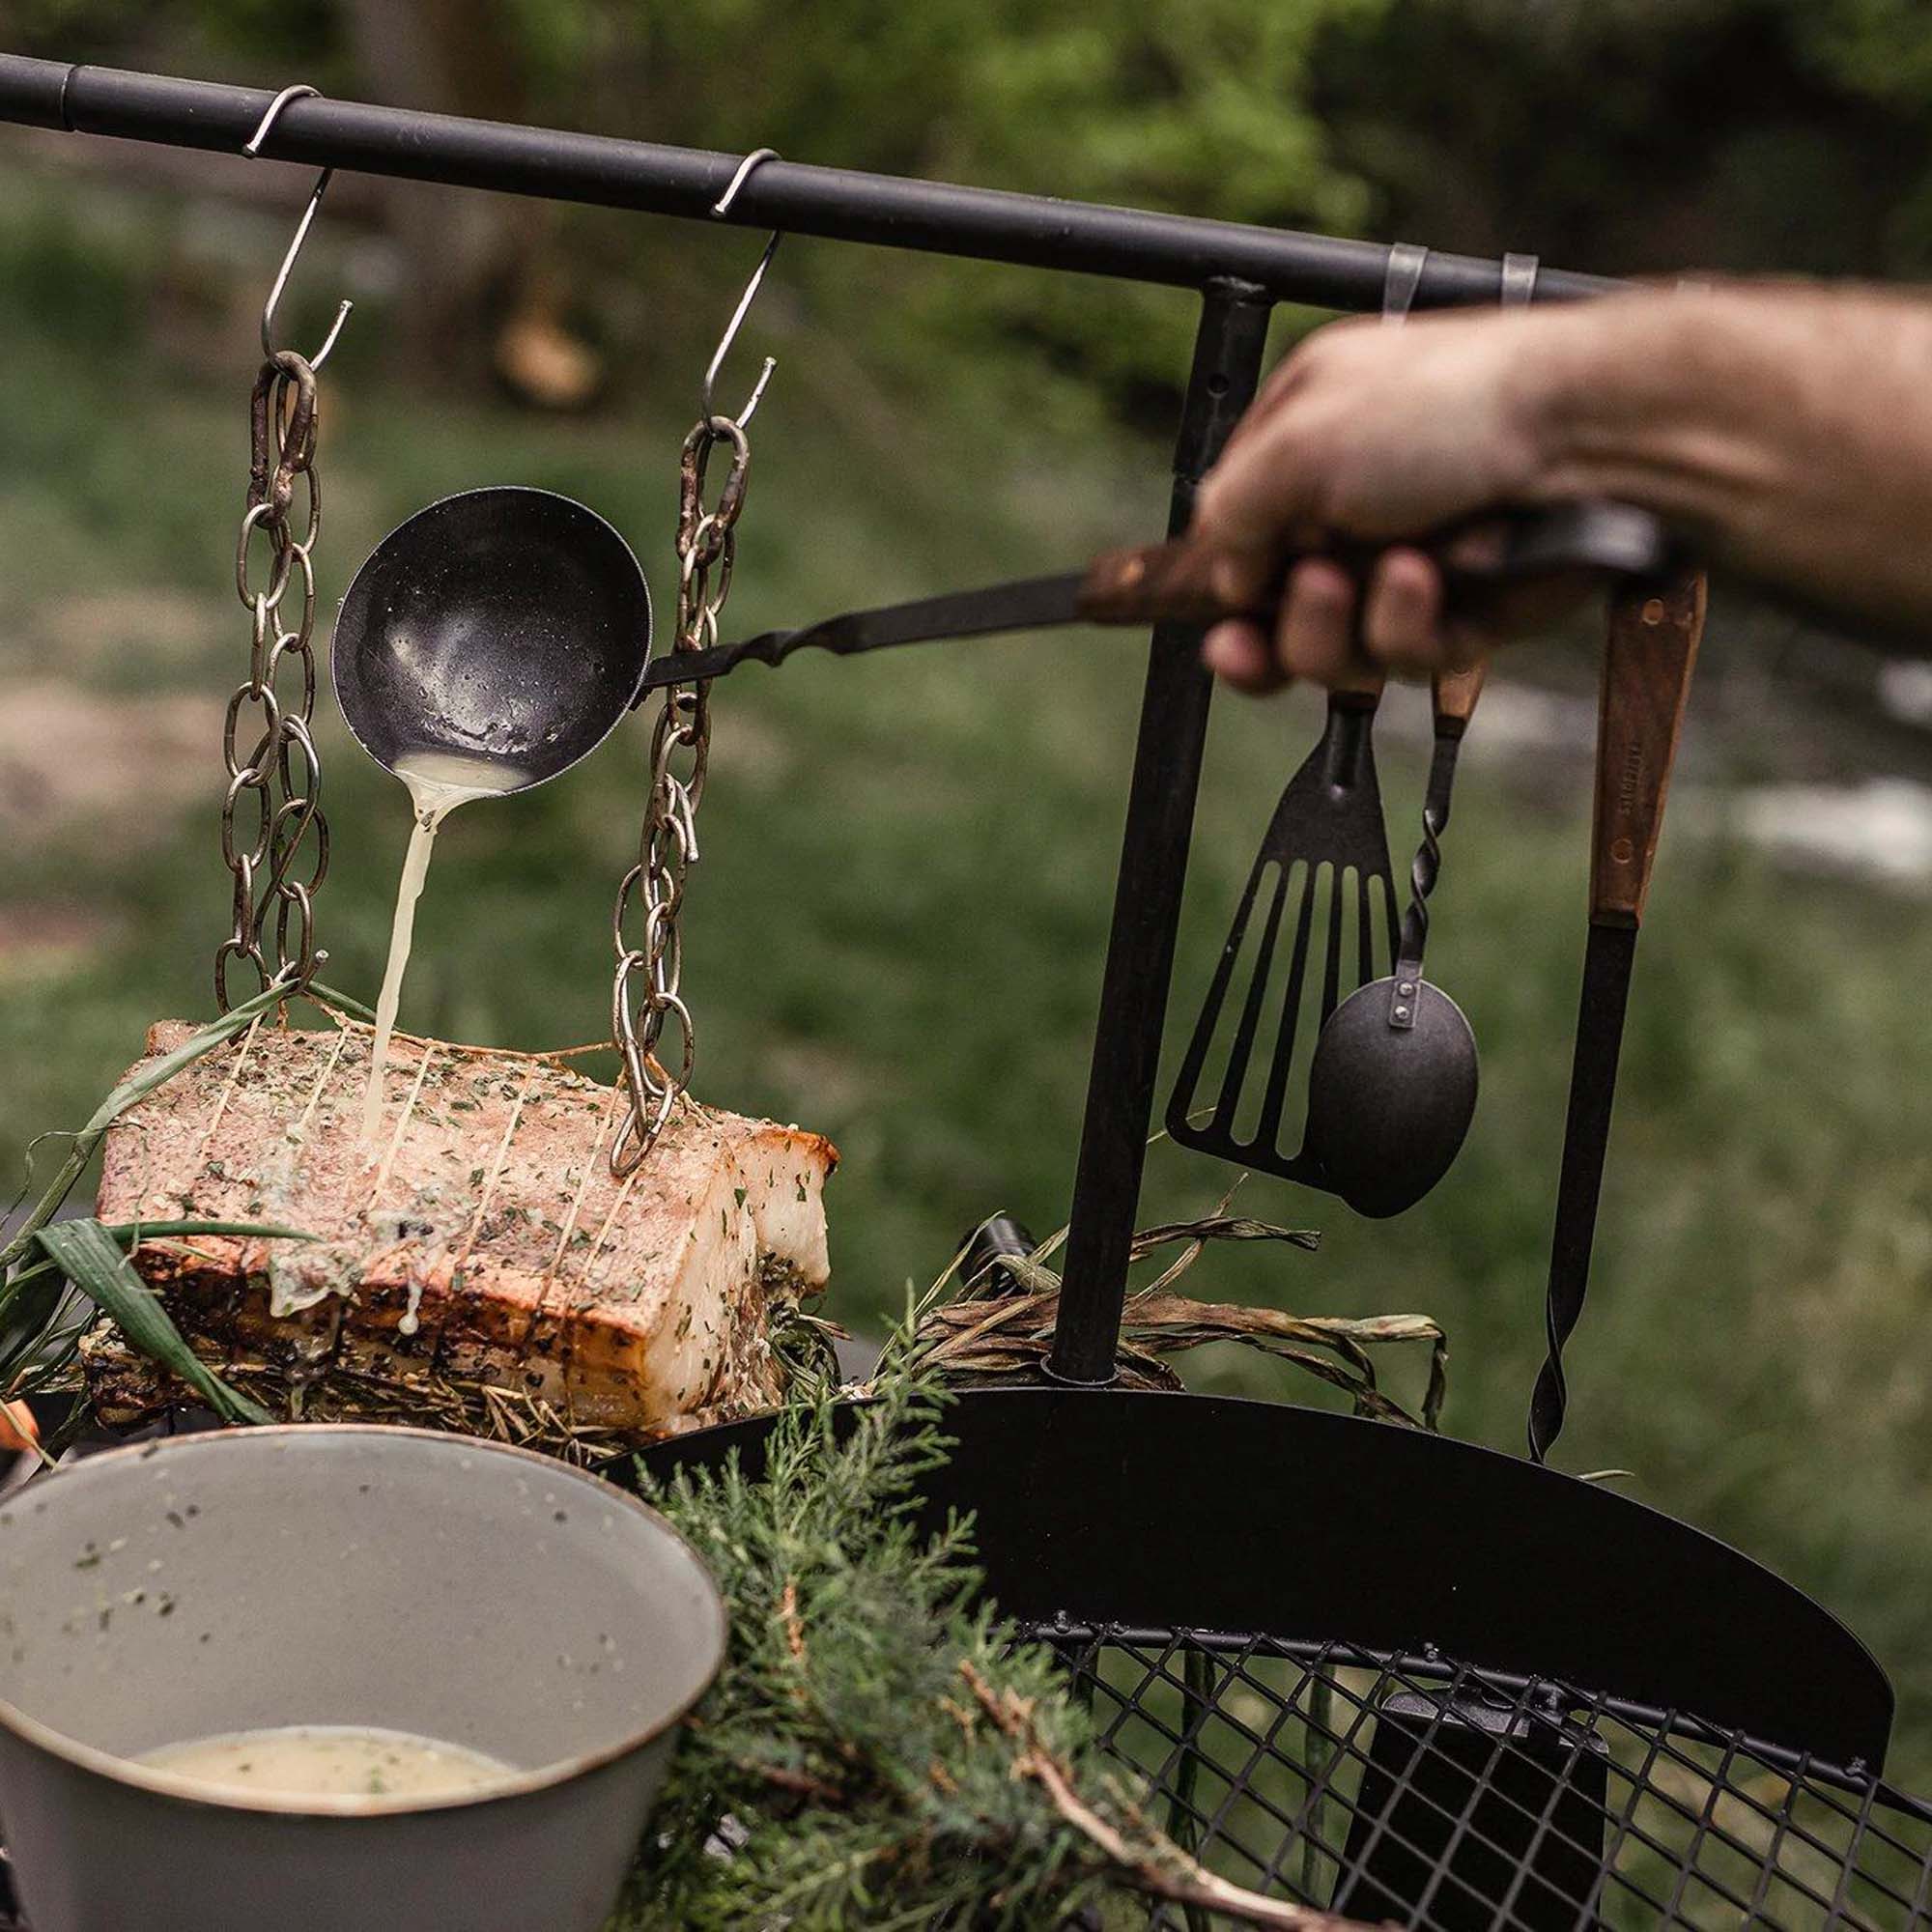
- Long-Handled Utensils: Spatulas, tongs, forks, and spoons designed for high heat and distance from flames.
- Heat-Resistant Gloves: Protect your hands when handling hot pots or moving coals.
- Cooking Thermometers: Ensure meat is safe to eat. Digital models are fast and accurate.
- Fire Starters: Waterproof matches, lighters, or fire starter sticks. Essential for lighting the fire in any weather.
- Pot Lifters: Special hooks for picking up heavy Dutch ovens safely.
Specialty Campfire Cooking Gear
If you want to expand your menu, consider these tools:
- Pie Irons: Clamp-style irons for toasting sandwiches, pies, or wraps over the fire.
- Skewers: Metal or bamboo sticks for roasting marshmallows, vegetables, or sausages.
- Campfire Rotisseries: Motorized or manual spit rods for roasting whole chickens or large cuts of meat.
- Popcorn Poppers: Wire mesh baskets for making popcorn over the flames.
Cooking Stands And Supports
Not every campfire is ideal for cooking. Sometimes the fire pit is too deep or the ground is uneven. Cooking stands help:
- Adjustable Cooking Stands: Metal frames that support pots, pans, or griddles above the fire.
- Hanging Chains and Hooks: Suspend pots from a tripod or branch.
- Portable Fire Pits: Contain the fire and create a stable surface for cooking.
How To Choose Campfire Cooking Equipment
Choosing the right gear can be tricky. Here’s how to make the best decisions:
Material Matters
The material affects weight, durability, and cooking performance.
| Material | Pros | Cons |
|---|---|---|
| Cast Iron | Excellent heat retention, lasts decades | Heavy, needs seasoning |
| Steel | Good strength, lighter than cast iron | Can rust, less heat retention |
| Aluminum | Very light, fast heating | Dents easily, uneven heating |
Size And Weight
Think about how much you can carry. For backpacking, choose lighter gear like aluminum pots and foldable grills. For car camping, cast iron and Dutch ovens are worth the extra weight.
Cooking Style
Are you grilling, boiling, frying, or baking? Match your gear to your menu. Dutch ovens are best for slow cooking. Griddles are great for breakfast. Grates are perfect for steak or burgers.
Group Size
For solo campers, a small skillet and pot are enough. For families or groups, bring larger pans, a Dutch oven, and multiple utensils.
Ease Of Cleaning
Campfire cooking can be messy. Choose equipment with smooth surfaces or nonstick coatings for easier cleaning. Cast iron needs special care, but it’s easy to clean if seasoned well.
Safety Features
Look for equipment with heat-resistant handles, sturdy bases, and safe lifting tools. Gloves and pot lifters help prevent burns.
Common mistake: Many beginners buy oversized gear. It’s better to start small and add more as you gain experience.
Essential Campfire Cooking Equipment Checklist
If you’re new to campfire cooking, start with these basics:
- Cast Iron Skillet (10–12 inches)
- Dutch Oven (with legs and flat lid)
- Portable Grill Grate
- Long-Handled Tongs and Spatula
- Heat-Resistant Gloves
- Fire Starter Kit
- Cooking Thermometer
- Heavy-Duty Pot or Kettle
- Skewers or Roasting Sticks
- Pot Lifter or Hook
With these items, you can cook most campfire meals. Later, add specialty items like pie irons or rotisserie kits.
Comparing Campfire Cooking Equipment Brands
There are many brands, but some stand out for quality and reliability. Here’s a quick comparison:
| Brand | Popular Products | Price Range | Best For |
|---|---|---|---|
| Lodge | Cast Iron Skillets, Dutch Ovens | $20–$100 | Durability, tradition |
| Camp Chef | Grill Grates, Cooking Stands | $25–$150 | Versatility, group cooking |
| GSI Outdoors | Aluminum Pots, Cookware Sets | $15–$75 | Lightweight, backpacking |
| Rome Industries | Pie Irons, Skewers | $10–$40 | Specialty tools |
Experience-based tip: Don’t judge by price alone. Well-known brands often offer better warranties and easier replacements.
Setting Up Your Campfire Cooking Area
A good setup is key to safe and enjoyable campfire cooking.
Location
Pick a flat, open spot away from tents and trees. Use a designated fire ring if possible. Clear away leaves and debris to avoid accidental fires.
Fire Preparation
Build a fire with dry wood. Let it burn down to hot coals for steady heat. Avoid cooking over open flames, which can burn food.
Equipment Placement
- Place grills and grates over the hottest part of the coals.
- Set up cooking stands or tripods for pots and Dutch ovens.
- Keep utensils and gloves nearby, but away from the fire’s edge.
Safety Rules
- Never leave the fire unattended.
- Keep water or sand nearby for emergencies.
- Use gloves when handling hot equipment.
- Cool all gear before packing.
Non-obvious insight: Wind can change fire direction suddenly. Position yourself and your equipment on the upwind side for safety.
Cooking Techniques For Campfire Meals
Campfire cooking isn’t just grilling. Here are some popular methods:
Direct Grilling
Place food on a grill over the coals. Best for steaks, burgers, and vegetables. Turn food often to avoid burning.
Skillet And Pan Cooking
Use a skillet for frying eggs, bacon, or pancakes. Move the pan to cooler parts of the fire if food cooks too fast.
Dutch Oven Baking
Place the Dutch oven on coals. For baking, add hot coals on top of the lid. Perfect for bread, casseroles, and desserts.
Skewering And Roasting
Thread meat or vegetables onto skewers. Hold over the fire or place on a grill grate. Rotate for even cooking.
Foil Packet Cooking
Wrap ingredients in aluminum foil and place directly on coals. Good for potatoes, fish, or mixed vegetables.
Boiling And Simmering
Use a pot or kettle for soups, stews, or boiling water. Hang from a tripod or place on a stand over the fire.
Practical advisor tip: Always check food for doneness. Use a thermometer, especially for poultry or large cuts.
Campfire Cooking Equipment For Different Camping Styles
Your camping style affects the gear you need. Here’s how to match equipment:
Backpacking
Focus on lightweight, compact gear.
- Aluminum pots
- Foldable grill grates
- Minimal utensils
- Small fire starter kits
Car Camping
More space means more options.
- Cast iron cookware
- Dutch ovens
- Large grill grates
- Cooking stands
Family Camping
Safety and versatility matter.
- Heat-resistant gloves
- Durable cookware
- Multiple utensils
- Specialty items (pie irons, popcorn poppers)
Group Camping
Cooking for many requires bigger tools.
- Extra-large Dutch ovens
- Multiple griddles
- Rotisserie kits
- Bulk firewood
Common mistake: Trying to use backpacking gear for group meals. It’s better to invest in larger, sturdier equipment.
Credit: barebonesliving.com
Maintenance And Care For Campfire Cooking Equipment
Well-cared gear lasts longer and works better. Here’s how to keep your equipment in top shape:
Cleaning
- Cast Iron: Avoid soap. Scrub with salt and water. Dry fully, then apply oil.
- Steel and Aluminum: Wash with mild soap and water. Dry completely to prevent rust.
- Grill Grates: Brush off food debris while still warm.
Storage
- Store in a dry place.
- Keep cast iron oiled to prevent rust.
- Avoid stacking heavy items that might dent or scratch lighter pots.
Repair
- Replace worn or broken handles.
- Tighten screws and bolts on stands or tripods.
- Re-season cast iron if it becomes sticky or rusty.
Non-obvious insight: Even nonstick surfaces can get damaged by campfire heat. Use wooden or silicone utensils to extend their life.
Safety Tips For Campfire Cooking
Cooking over fire comes with risks. Here’s how to stay safe:
- Always use heat-resistant gloves and long-handled tools.
- Keep children and pets away from the cooking area.
- Never pour water on hot cast iron—it can crack.
- Let all equipment cool before packing.
- Dispose of hot ashes safely.
Straight-to-the-point helper tip: Always check your equipment before each trip. Damaged gear can cause accidents.
Credit: coloradosundays.com
Upgrading Your Campfire Cooking Experience
Once you’re comfortable with basic gear, you can improve your setup with new tools or techniques:
- Try baking bread in a Dutch oven for a new challenge.
- Add a rotisserie for roasting whole chickens.
- Use a pie iron for creative sandwiches and desserts.
- Experiment with foil packets for easy cleanup.
You can find more advanced tips and recipes at REI’s Campfire Cooking Guide.
Real-life Examples And Data
Many campers report that campfire meals are a highlight of their trips. According to a 2022 survey by the Outdoor Industry Association, 62% of campers say cooking outdoors is their favorite activity. Popular meals include chili, grilled meats, and baked desserts.
Experienced guide tip: Don’t worry if your first few meals aren’t perfect. Campfire cooking takes practice. Focus on enjoying the process and learning what works for you.
Comparing Campfire Cooking Equipment Costs
Here’s a quick look at how much you might spend to build a basic campfire cooking kit:
| Equipment | Average Price | Durability |
|---|---|---|
| Cast Iron Skillet | $30–$50 | 10+ years |
| Dutch Oven | $60–$100 | 20+ years |
| Portable Grill Grate | $25–$70 | 5–10 years |
| Fire Starter Kit | $10–$25 | 1–2 years |
| Heat-Resistant Gloves | $15–$35 | 3–5 years |
Most campers spend between $150 and $300 on a full kit. Buying quality gear saves money in the long run because it lasts longer.
Tips For Packing And Transporting Campfire Cooking Equipment
Packing your gear correctly prevents damage and makes setup easier.
- Use padded cases for cast iron and Dutch ovens.
- Wrap utensils in cloth to avoid scratches.
- Store fire starters in waterproof bags.
- Separate dirty and clean items to avoid cross-contamination.
Friendly mentor tip: Don’t forget cleaning supplies like sponges and towels—they’re often overlooked but make a big difference.

Credit: www.amazon.com
Frequently Asked Questions
What Is The Best Material For Campfire Cooking Equipment?
Cast iron is often the top choice because it handles high heat, lasts for decades, and improves with use. Steel is lighter and good for basic pots and grates, while aluminum is best for backpackers who need to save weight.
How Do I Clean Cast Iron Cookware After Campfire Cooking?
After cooking, let the pan cool, then scrub with salt and a little water. Avoid soap, as it removes seasoning. Dry the pan fully and rub with oil to protect it from rust.
Can I Use Regular Kitchen Pots And Pans For Campfire Cooking?
Most home cookware is not made for direct flame. It can warp, melt, or even break. Always use campfire-safe gear—cast iron, steel, or camping-specific aluminum.
How Do I Prevent Food From Sticking To Campfire Cookware?
Season your cast iron before use, and heat the pan well before adding food. Use oil or butter as needed. For aluminum and steel, use a nonstick spray or cook with enough liquid.
What Safety Precautions Should I Take When Cooking Over A Campfire?
Use heat-resistant gloves and long-handled tools. Keep water or sand nearby to control the fire. Never leave the campfire unattended, and always cool your equipment before packing.
Cooking over a campfire brings joy and adventure to any trip. With the right campfire cooking equipment, you can create unforgettable meals and memories in the great outdoors. Whether you’re starting out or upgrading your gear, focus on safety, quality, and choosing tools that fit your style. The magic happens when you gather around the fire, share food, and enjoy the moment together.
