
Spending time outdoors often means searching for comfort between two trees. Hammocks offer a simple way to relax, read, nap, or enjoy the breeze. But many people struggle with tying them securely. An improperly tied hammock can lead to discomfort—or even a fall. Learning to tie a hammock safely is not only practical, but also adds to your outdoor confidence. Whether you’re setting up in your backyard, at a campsite, or between palm trees on the beach, knowing the right methods makes a big difference.
This guide covers everything you need: from choosing the right spot, to understanding the best knots, to common mistakes and safety tips. You’ll also find tables comparing types of hammocks and ropes, plus real-world tips that even experienced hammock users sometimes overlook. By the end, you’ll know exactly how to tie a hammock that is safe, comfortable, and perfectly suited to your needs.
Why Tying A Hammock Correctly Matters
Many people think any rope and any knot will do. In reality, proper hammock setup is about safety and comfort. A poorly tied hammock might slip, sag too much, or even damage the trees. If you tie it too tight, you’ll feel stiff and uncomfortable. If you tie it too loose, you’ll be too close to the ground, or worse, end up on the ground.
A good setup:
- Prevents accidents and injuries
- Protects the trees and environment
- Increases hammock lifespan
- Enhances your comfort
Getting it right means you can relax with peace of mind.
Types Of Hammocks And How They Affect Tying
Not all hammocks are created equal. The way you tie a hammock depends on its type and materials. Here’s a closer look.
| Hammock Type | Material | Attachment Method | Best For |
|---|---|---|---|
| Rope Hammock | Cotton or Polyester Rope | Loops or Metal Rings | Backyards |
| Fabric Hammock | Cotton Canvas/Polyester | End Loops | Camping, Indoors |
| Parachute Hammock | Nylon | Carabiners and Straps | Backpacking, Hiking |
| Spreader Bar Hammock | Cotton, Polyester, Nylon | Rings or Loops | Poolsides, Patios |
Parachute hammocks are popular with campers because they’re lightweight and quick to dry. Rope hammocks are classic and breathable but may need special knots. Understanding your hammock type helps you pick the best tying method.
Choosing The Right Location
Where you hang your hammock matters as much as how you tie it. Look for strong, healthy anchors like trees, posts, or sturdy structures. Here’s what to check:
- Tree health: Use only living, healthy trees at least 6 inches (15 cm) in diameter. Dead or young trees can snap.
- Distance: The best distance between anchor points is about 10 to 15 feet (3–4.5 meters) for most hammocks.
- Height: Attach your hammock at about head height (around 5–6 feet, or 1.5–1.8 meters) off the ground.
- Ground surface: Avoid rocky, sloped, or wet ground under the hammock.
- Surroundings: Make sure there are no sharp objects, thorny plants, or animal nests nearby.
If you’re using posts or walls, ensure they’re strong enough to hold your weight.
Understanding Hammock Suspension: Ropes, Straps, And Hardware
The suspension system connects your hammock to the anchors. There are three main types:
- Ropes: Traditional, easy to find, but can harm tree bark if too thin.
- Tree straps: Wide webbing (1 inch or more) that wraps around the tree, preventing damage.
- Hardware (carabiners, hooks): Quick and convenient, but must be rated for enough weight.
Below is a quick comparison of common suspension systems.
| Suspension Type | Pros | Cons | Weight Capacity (avg.) |
|---|---|---|---|
| Rope | Lightweight, adjustable | Can damage trees, knots can slip | 200–400 lbs |
| Tree Straps | Tree-friendly, easy to use | Heavier than rope, bulkier | 400–1000 lbs |
| Hardware (Carabiner/Hook) | Quick setup, secure | Extra weight, needs strong anchors | 300–1000 lbs |
Tree straps are usually the best choice for the environment and your hammock’s safety.
Essential Knots For Tying A Hammock
Knowing a few basic knots makes your setup safer and more reliable. Here are the three most useful knots for hammocks:
1. Bowline Knot
Strong and easy to untie, even after bearing weight. Great for making a fixed loop at the end of your rope.
Steps:
- Make a small loop in the rope, leaving enough tail.
- Pass the tail up through the loop, around the standing part, and back down through the loop.
- Pull tight.
The bowline is excellent for attaching rope to a tree or post.
2. Becket Hitch
Favored by experienced hammock campers. Works well with webbing or rope and is easy to adjust.
Steps:
- Pass the end of the rope around the anchor.
- Loop the tail around the standing part, then tuck it under itself.
- Pull tight.
3. Double Half Hitch
Simple, reliable, and holds under tension. Good for tying to hooks or carabiners.
Steps:
- Pass rope around your anchor.
- Make two half-hitches (simple overhand knots) around the standing part.
- Tighten.
Practice these knots before your trip to avoid frustration later.
Step-by-step: How To Tie A Hammock Safely
Let’s walk through the full process, using two trees as an example. The same methods apply to posts or other anchors.
Step 1: Gather Your Supplies
You’ll need:
- Hammock (with end loops or rings)
- Rope or tree straps (strong, tree-friendly, 10–15 feet long)
- Carabiners or hooks (optional, but convenient)
- Scissors or knife (for rope, if needed)
Step 2: Choose The Right Trees And Measure Distance
Pick trees at least 10–15 feet apart. Too close means your hammock will sag; too far, and you’ll need extra rope.
Step 3: Wrap The Tree Straps Or Rope
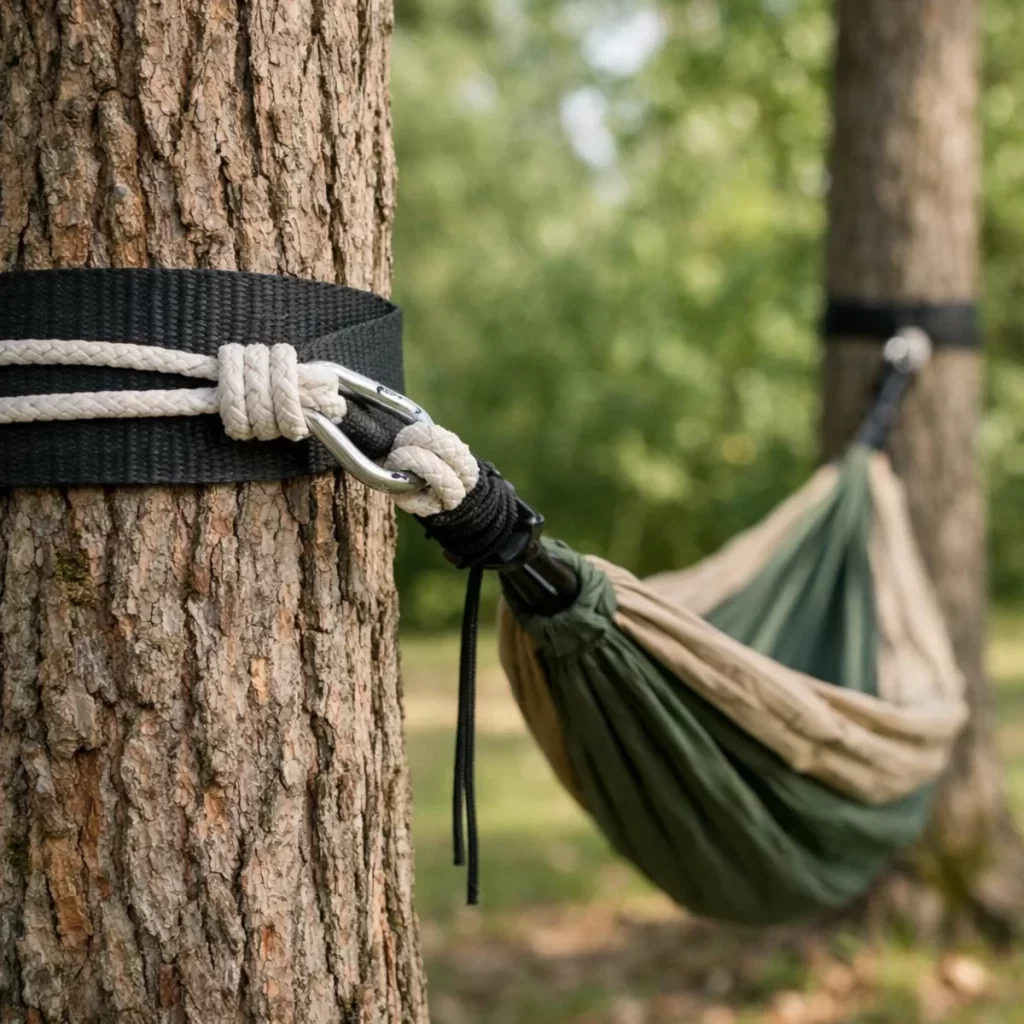
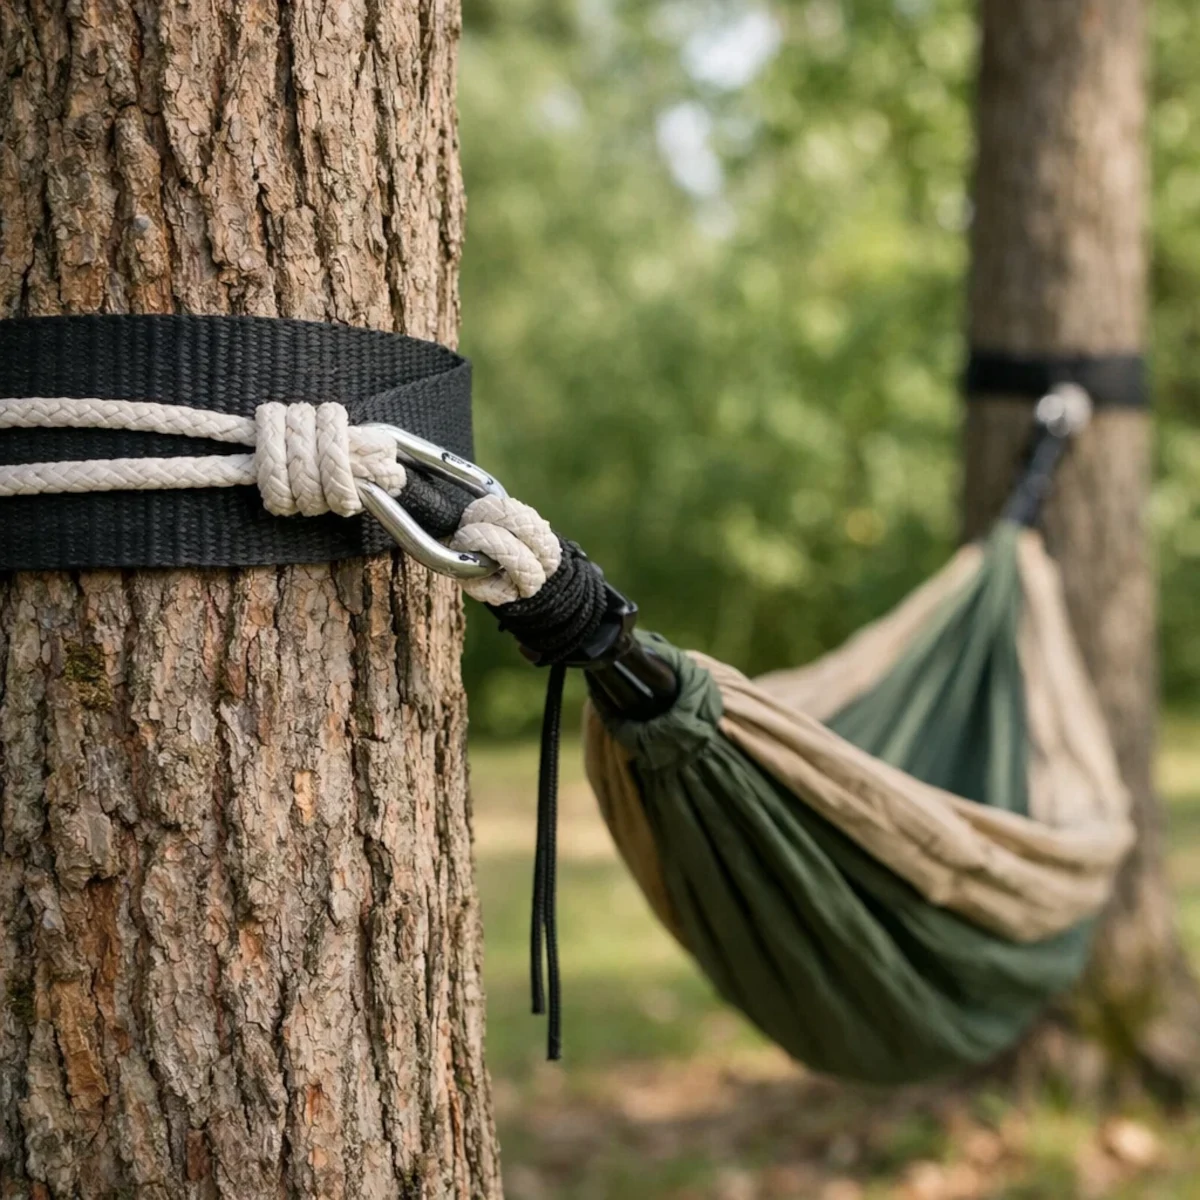
Wrap your strap or rope around the first tree at about head height. If using straps, thread the end through the loop to secure. With rope, make a bowline or double half hitch.
Repeat on the second tree.
Step 4: Attach The Hammock
Clip the hammock’s loop or ring to the strap or rope using a carabiner, S-hook, or a knot like the becket hitch. Adjust the height so the lowest point of the hammock is about 18 inches (45 cm) above the ground—chair height.
Step 5: Adjust Sag And Tension
A common mistake is tying the hammock too tight. You want a gentle curve, like a banana, not a straight line. Aim for a 30-degree angle from the tree to the hammock.
Step 6: Test Before Use
Press down gently on the hammock to check for slipping or stretching. Sit in it slowly before lying down fully. Check knots and straps for movement.
Tip: If the hammock sags too much, move the straps higher on the tree rather than pulling tighter.
Credit: www.aosom.com
Common Mistakes To Avoid
Many beginners make these errors:
- Using thin rope that cuts into trees—always use straps at least 1 inch wide.
- Tying too tightly—you lose comfort and add stress to anchors.
- Anchoring too low—you’ll end up on the ground.
- Ignoring the ground below—sharp rocks or roots can be dangerous.
- Using weak anchors—never use dead trees or rotten posts.
- Forgetting to test—always check your setup before relaxing.
Pro insight: Even experienced campers sometimes forget to check the angle. That 30-degree sag is key to both comfort and safety.
Hammock Setup For Different Environments
Tying a hammock in your backyard isn’t the same as setting up in the wild. Here’s how to adapt your technique.
Backyard Or Garden
- Use permanent posts or hammock stands if trees aren’t available.
- Concrete posts should be at least 4×4 inches and buried at least 2 feet deep.
- With stands, follow manufacturer instructions and never exceed the weight limit.
Camping Or Backpacking
- Always use tree straps to protect the environment.
- Check local rules—some parks ban hammocks or require special straps.
- Bring extra rope or straps for flexibility (trees may not be perfectly spaced).
Indoors
- Use hammock hooks drilled into wall studs or ceiling joists.
- Use a stud finder to ensure you’re anchoring into solid wood.
- Never hang a hammock from drywall alone—it won’t hold.
Credit: www.aosom.com
Weather Considerations And Extra Protection
Weather can affect how you tie and use your hammock.
- Rain: Use a tarp or rainfly above your hammock. Tie the tarp separately from the hammock so water doesn’t run down the ropes.
- Wind: Anchor low to the ground to reduce swaying.
- Cold: Add an underquilt or sleeping pad beneath the hammock to block wind and keep warm.
Always check for dead branches above your hammock, known as “widowmakers,” which can fall during storms.
Hammock Safety Tips
Staying safe is more than just tying a good knot.
- Don’t exceed the hammock’s weight limit.
- Only one person at a time unless the hammock is rated for two.
- Never swing or jump into the hammock.
- Don’t tie to objects that might move, like a thin fence or small tree.
- Keep pets and small children supervised around suspended hammocks.
Pro tip: Hammocks are more stable when you lie diagonally, not straight down the middle.
Environmental Responsibility
Hammocks, when used incorrectly, can damage trees and sensitive areas. Always:
- Use wide tree straps to prevent bark damage.
- Avoid rare or slow-growing tree species.
- Follow Leave No Trace principles—pack out all gear and trash.
- Don’t tie to structures not meant for weight, like picnic tables or signs.
Some parks have banned hammocks due to irresponsible use. Set a good example so others can enjoy hammocks too.
Comparing Hammock Rope And Strap Materials
Not all ropes and straps are equal. Here’s how common materials compare for hammock use.
| Material | Strength | Stretch | Weather Resistance | Tree Safety |
|---|---|---|---|---|
| Nylon Rope | High | Some (can sag when wet) | Good | Medium (can cut bark) |
| Polyester Rope | Very High | Low | Excellent | Medium |
| Cotton Rope | Medium | High | Poor (rots if wet) | Low |
| Webbing Strap | Very High | Low | Excellent | High (protects trees) |
Webbing straps are the best for both tree safety and durability. Cotton ropes are comfortable but not great for wet conditions.
Advanced Hammock Setups
For those who want extra comfort or need to set up in tricky spots, these advanced techniques can help.
Whoopie Slings
A lightweight, adjustable suspension made from strong rope. They allow you to fine-tune the hammock’s height and tension without retying knots.
Ridgeline
A fixed cord tied between the two anchor points, above the hammock. It keeps your hammock’s sag consistent and gives you a place to hang gear or a bug net.
Daisy Chain Straps
Straps with multiple loops for easy adjustment. Just clip your carabiner into the loop at the right height—no knots needed.
Using Carabiners And Quick Links
Aluminum or steel carabiners offer a fast, secure connection. Always check the weight rating (should be at least 1000 lbs for hammock use). Quick links (oval-shaped screw links) are another strong and reliable option.
Non-obvious insight: If you camp often, learning to use whoopie slings and ridgelines will save time and make every setup consistent and comfortable.
Hammock Hanging For Kids And Pets
Kids and pets love hammocks, but extra care is needed.
- Hang lower to the ground (12–16 inches) to reduce fall risk.
- Always supervise children.
- Choose hammocks with enclosed sides or bug nets for young kids.
- For pets, use a blanket or mat to prevent claws from damaging the fabric.
Never let kids swing too high or jump from the hammock. Accidents can happen quickly.
Hammock Storage And Maintenance
A well-cared-for hammock lasts longer and is safer to use.
- Shake out dirt and leaves after each use.
- Wash fabric hammocks in cold water and air dry.
- Store in a dry, cool place—never leave outside in rain for long periods.
- Check ropes, straps, and hardware for wear before every trip.
- Avoid using bleach or harsh cleaners, which can weaken fibers.
If you see frayed ropes, torn fabric, or bent hardware, repair or replace before using again.
Troubleshooting Common Hammock Problems
Even with the best setup, problems can happen. Here’s how to fix them:
- Hammock sags too much: Move straps higher on the anchor, or shorten the suspension.
- Straps slip down the tree: Make sure straps are flat, not twisted. Use a bark-friendly strap with more grip.
- Uncomfortable pressure points: Lie diagonally, not straight. Add a blanket or sleeping pad inside.
- Getting wet in rain: Attach drip lines (small pieces of string) to your suspension to divert water.
- Hammock tilts or flips: Make sure both sides are at equal height and tension.
If you’re unsure about a fix, take down and retie your hammock rather than risk a fall.
Real-world Examples: Learning From Experience
Sometimes, experience is the best teacher. Here are a few real-world examples and what they teach us:
- Case 1: Slippery Knot Failure
- A camper used an ordinary shoelace knot. The hammock slipped, and he ended up on the ground. Lesson: Always use proper knots like the bowline or becket hitch.
- Case 2: Tree Damage
- Thin rope cut into the bark, leaving scars. The park banned hammocks as a result. Lesson: Use wide tree straps to protect nature.
- Case 3: Rain Disaster
- A family hung their hammock under a tree without a tarp. A sudden storm soaked everything, including their sleeping bags. Lesson: Always check weather and set up a rainfly in advance.
- Case 4: Hammock Too High
- A child fell and was injured because the hammock was hung 3 feet off the ground. Lesson: For kids, keep hammocks low and supervise.
Learning from others’ mistakes is a smart way to avoid your own.
Packing For Hammock Camping: What To Bring
If you’re heading out for a night in your hammock, pack these essentials:
- Hammock (with loops or rings)
- Tree straps (at least 1 inch wide, 10–15 feet long)
- Carabiners or hooks (rated for 1000 lbs)
- Rainfly or tarp (for weather protection)
- Bug net (insect-prone areas)
- Sleeping pad or underquilt (for insulation)
- Small repair kit (duct tape, spare rope)
- Headlamp or flashlight
Being prepared means you can set up anywhere, in any weather, and sleep comfortably.

Credit: www.republicofdurablegoods.com
Where To Learn More
If you want to dive deeper into advanced hammock setups, knots, or the science of hammock comfort, excellent resources are available. For example, the Hammock Forums community and the article on hammock camping on Wikipedia provide detailed insights and discussions from experienced users.
Frequently Asked Questions
How Far Apart Should Trees Be To Hang A Hammock?
For most hammocks, 10–15 feet is ideal. Shorter distances require less rope and give a better sag. If trees are too far apart, you’ll need extra suspension, and the hammock may hang too low. Always check your hammock’s instructions for the best range.
What Kind Of Rope Or Straps Should I Use?
Use wide tree straps (at least 1 inch) made of polyester or nylon for both strength and tree protection. If you use rope, pick polyester or nylon with a high weight rating. Avoid thin cord, as it can damage tree bark and is less safe.
How High Should I Hang My Hammock?
Attach straps or rope at about head height (5–6 feet) on the tree or post. The lowest point of the hammock should be 18 inches (chair height) off the ground after you get in. For kids, hang the hammock lower (12–16 inches).
How Do I Keep My Hammock From Flipping Over?
Make sure both suspension points are at the same height and tension. Lie diagonally across the hammock instead of straight down the middle. This lowers your center of gravity and makes the hammock more stable.
Can I Use A Hammock Indoors?
Yes, you can hang a hammock indoors using wall or ceiling hooks. Always anchor into solid wood studs or ceiling joists. Never use drywall or plaster alone. Use a stud finder and follow weight recommendations for the hardware.
Relaxing in a well-tied hammock is one of life’s simple joys. With the right knowledge and a little practice, you can set up safely and comfortably in almost any location. Remember, your comfort and safety always come first—take your time, double-check your knots, and enjoy every moment off the ground.
