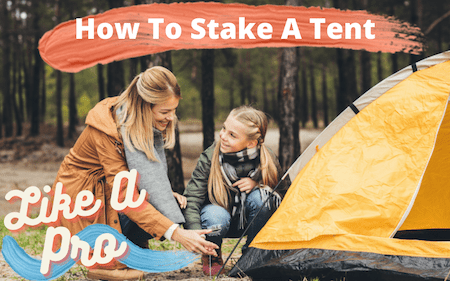
One of the most common camping fails that we generally come across is a poorly staked tent. All your camping trip fun is going to blow away with just a single windstorm if you don’t have a proper tent.
Strong winds and sudden rainfalls can make staking a tent complicated for anyone. It’s even more difficult if you are a beginner with no previous experience.
This is why it’s essential to have a basic knowledge of the entire procedure. It can help you fight the severity of the weather and help you get better at staking tents.
So, if you are a person who loves to go camping and want to learn how to stake a tent, this is the right place for you!
Tent Gear You’ll Need
Before learning how to stake a tent, let’s see what you need for staking the tent.
The necessary gear that you would carry for your tent can have lots of items and tools included in them.
However, these are the most important ones that you should always have.
- Groundsheets or tarpaulin (tarp)
- A rainfly
- The tent itself
- Stakes
- Poles
These are the most necessary tent gears that everyone should carry. They can make your experience of setting up your tent and staking it a lot better.
You can make a checklist of all the items you need to keep track of before heading out for the camp.
Now, there is some more equipment that you can have with you to make your job easier. It’s possible to stake the tent without them, but definitely not easier.
Keeping a mallet will help you to drive the stakes to the ground. A peg remover will help you take down the tent, and a handheld brush will allow you to sweep the inside of your tent.
All of these are quite useful items that will make the staking easier.
You can also include rolling mats, sleeping pads or sleeping bags, and some safety items. Carry a first aid kit and insect repellent if there are too many insects.
Make sure to take your cookware if you are going on a weekend trip.
Finding The Ideal Spot
Before we move on further, let’s learn how you can find the ideal spot to set up your tent.
If you are not going to a campsite or a campground, it is essential to know what you are looking for.
Always go for a location that is on higher ground. It allows you to be safe from flash floods. Steer clear of places such as canyon floors and river streams since they can expose you to flooding as well.
Check your surroundings out properly and keep an eye out for things such as beehives, spider webs, or even a widowmaker.
Make sure that your tent is considerably far away from the fire as well. It’s to prevent any embers from coming onto it.
Learn how safe a tent is and what kind of safety precautions you should take.
How To Stake A Tent Like A Pro [6 Quick Steps]
Escaping from all your work for the weekend and staying outdoors for the weekend sounds like a great idea.
Whether or not you are with anyone, the one thing that you have to do properly if you go camping is to stake your camp up properly.
Remember that different tents have different setup procedures.
In this guide, we’ve discussed the most common and easiest ways for you to stake a tent.
#1. Set Up The Foundation For The Tent
A major portion of staking the tent depends on how you set the foundation. If it’s not strong enough, a strong wind can knock it away in no time!
So, let’s see how you can set up the foundation so that you have a strong tent.
Lay a groundsheet or a protective tarp on the ground. That will be the footprint of your tent. With the tarp, you get a barrier that stays between the ground and the base of your tent.
Doing this will help you improve your tent’s lifespan since it will be kept away from gathering moisture underneath.
The tarp doesn’t just stop at that. It also helps you keep the base of your tent clean and away from dirt, and it also helps make the base feel a lot more comfortable and dry.
You can easily tuck in the edges of the tarp underneath if it has a bigger footprint than that of your tent.
Why, you ask?
Because, you will have water coming in underneath the base of your tent, over the tarp, since the rainfly might collect some water. And this tarp will save you from that.
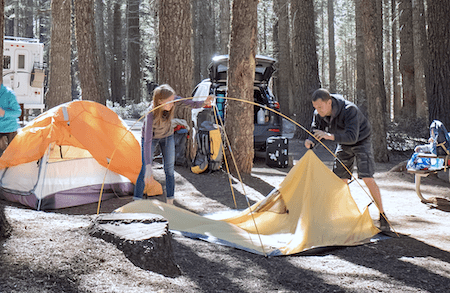
#2. Roll The Tent Out On Top Of The Foundation
Start by unfolding your tent and finding the side of the tent with the base.
You need to lay down the side with the base on top of the groundsheet or tarp that you have down. Make sure you take into account where you want the tent’s door to be when you are doing this.
The direction you set up your door can be a significant thing to consider, especially if the tent you are setting up is a big one. It’s because you will find it harder to reposition a bigger tent when you set it up.
Now, it is time for you to separate the tent fly and poles. You should also ready out the stakes/pegs to use them.
A great thing you could do here is to record the number of pegs you are using.
This way, when you are packing up, you can counter-check the number of pegs to make sure you did not lose any of them or forget any behind.
#3. Connect The Poles Of The Tent
Tent poles are usually separated into bits that you need to connect with the help of a bungee rope or a stretchy cord.
They are easy to fold and store. Start by connecting the different sections to prepare the tent poles. You can then just let them down across the flat tent you have down.
Attach the poles with their corresponding colors or numbers. If you don’t see any, you can always refer to the instruction manual with the tent.
You can even label them yourself to make it easier for you the next time you have to set it up again.
The interlinked parts of the tent poles will tell you whether or not it needs to be connected with a pull or push action.
Most of the tents you will come across will generally just use two tent poles. You need to cross the two of them to form an X, which will act as the base of your tent.
Some tents will need to be connected to the outer fly even before the inner side is clipped in.
If this is the case with your tent, you can have the ends of the poles go into the attachments for the poles.
To fit them in properly, you can bend the poles. Don’t worry, you can straighten the bent poles later.
Finally, all you need to do is clip the sides and the top of the inner tent to the poles.
However, if your tent comes with flaps and sleeves instead of clips connected to the poles, you will need to follow a different procedure.
You just need to slide in the tent’s poles through the sleeves. It’s to secure the ends of the pole into the attachments for the pole at the base of the tent.
Some tents come with a tie at the top of the inner tent. It’s to allow the poles to be kept intact with just a simple bow on the top.
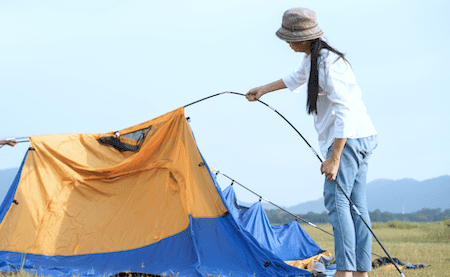
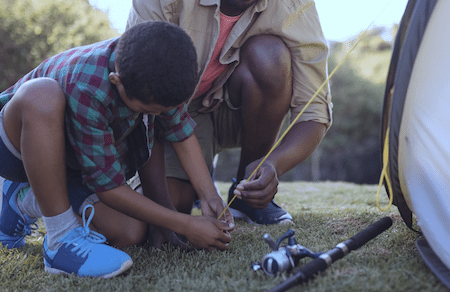
#4. Stake The Tent In
When you stake your tent, it can hold not just the tent, but everything in it.
Make sure that you have the door up in the opposite direction from the wind before you stake your tent.
If your tent door is not set up in the right direction, you can always just turn the tarp and the tent to face the right direction.
A regular tent will most likely need you to bend the poles slowly to raise the tent. But, a self-standing tent will have poles that will turn in place for pitching the tent.
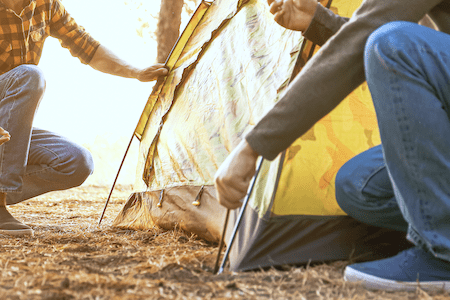
To secure the four corners of the tent to the ground, you can always just use a stake or a peg. However, it is possible to stake a tent without stakes.
Pull the corners away from each other to add some tension to the tent. Do this before you stake your tent so that any slack is removed.
While you probably will not do it perfectly, try to push the stakes deep enough in the ground. You should ensure that it is leaning away from the tent and put in at a 45-degree angle.
Do not push them too far into the ground. Leave them exposed enough for you to slip a tie-down cord over them and remove them when you are taking the tent down easily.
If you do not have a hammer or a mallet with you, then you can just use a large enough rock to drive the stakes into the ground.
Remember to bring in some extra stakes/pegs with you just as an act of precaution.
#5. Attach The Rainfly
Now, just place the rainfly on top of the frame of your tent. Make sure that you align the door of the inner tent with the door of the rainfly.
Use the tabs or loops on the inside of the fly to secure it to the poles. Make sure that the doors of the fly are zipped close.
You can stake the fly in place by drawing out the bottom loops of the rainfly as far as you can from the inner tent.
Do your best to keep the tension across the rainfly as evenly as you can. It’ll allow you to prevent it from touching the inner tent or flapping.
If you do this, you can better protect the inner tent from any elements, and it will also be a lot more effective when it comes to airflow management.
Keep in mind that you will need to readjust and recheck the tension on the rainfly quite regularly. It’s because the material on the rainfly might get stretched out from the rain.
#6. Guy Out The Tent
The last step you have to do is to secure the shelter onto the ground or even nearby trees, rocks, or logs.
With guy lines, you can create some extra tension on the tent. It means that the tent will have a lot more stability when the high wind blows out.
The guy lines can also help you get better air ventilation inside the tent by keeping the inner tent away from the rainfly.
A bowline knot will likely work the best if you have tensioners. If not, then you can tighten the guy lines at the tent’s stake with the help of a trucker’s hitch.
Guy lines are generally attached at the points of guy-outs on the side of the tent where the wind is coming in from. It allows for equal stabilization on all sides.
If you cannot find a proper rock or a tree nearby, you can also use a trekking pole. To increase tent strength, you should have the guy lines perpendicular to the corresponding guy out points.
You should also note that you will not be able to make a non-freestanding tent stand up without guy lines.
Consider reading this post on how to use tent guy lines to do it right.
Final Words
Going out on a camping trip can be a refreshing and adventurous experience. However, it can also be quite frustrating if you do not follow the proper procedure.
We hope our guide has helped you understand everything you need to know about how to stake a tent.
Happy camping!