Do you want to learn how to create a camping drawing that looks amazing but is easy to do? You’re in the right place.
This step-by-step guide will show you exactly how to draw a camping scene, even if you’ve never picked up a pencil before. By breaking it down into simple steps, you’ll feel confident and enjoy the process. Keep reading, and soon you’ll have a beautiful camping drawing you’ll be proud to share!

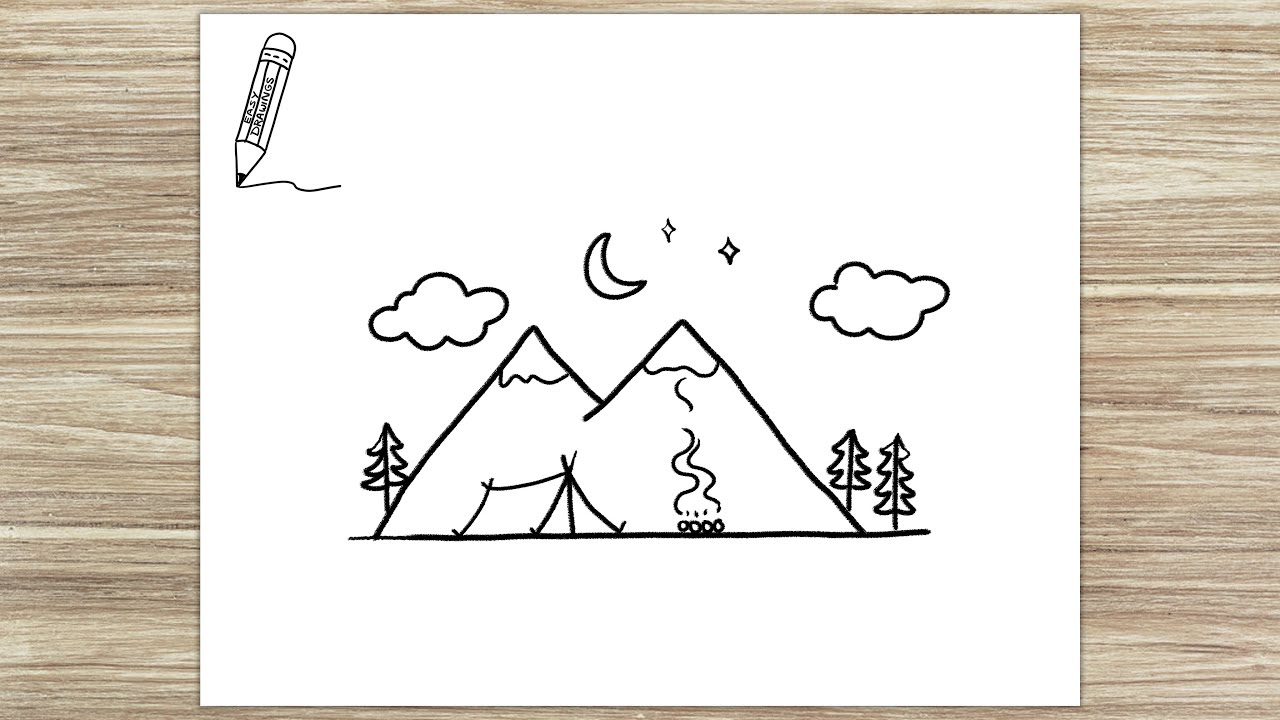
Credit: www.youtube.com
Materials Needed
Gathering the right materials is the first step to start your camping drawing. Simple tools help you create clear and fun pictures. You do not need many items. Just a few basics will do.
Choose quality materials for better results. They make drawing easier and more enjoyable. Each item plays a role in your drawing process. Prepare everything before you begin to avoid breaks.
Drawing Paper
Use plain white paper for your camping sketches. Thick paper works best to hold colors well. Choose a size that fits your workspace. Avoid glossy paper because it can smudge your colors.
Pencils And Erasers
Start with a pencil to sketch your camping scene lightly. Use a soft pencil, like a 2B, for smooth lines. Keep a good eraser handy to fix mistakes. A kneaded eraser works well for gentle corrections.
Colored Pencils Or Markers
Add color to your drawing with pencils or markers. Colored pencils offer control and blend nicely. Markers give bright, bold colors but may bleed through thin paper. Choose based on your style and paper type.
Ruler And Compass
Use a ruler to draw straight lines, such as tents or campfire shapes. A compass helps make perfect circles like the sun or lanterns. These tools bring neatness and accuracy to your drawing.
Sharpener
A sharp pencil creates clean and detailed lines. Keep a sharpener nearby to maintain your pencil points. This keeps your drawing crisp and easy to see. Avoid dull pencils that make messy lines.
Basic Shapes For Camping Elements
Drawing camping scenes is easier when you start with basic shapes. Simple circles, squares, and triangles form the base of most camping elements. These shapes help break down complex objects into easy steps. Beginners can use these shapes to build their drawing with confidence.
Starting with basic shapes guides your hand and eye. It also keeps your drawing neat and balanced. From tents to trees, every camping item begins with a simple shape. This method saves time and makes your art look better.
Tent: Triangle And Rectangle
Begin with a triangle for the tent’s roof. Add a rectangle at the bottom for the tent’s body. These shapes show the tent’s basic form. Draw lightly so you can erase and adjust lines later.
Campfire: Circles And Ovals
Start with small circles for the firewood ends. Use ovals to show the logs stacked together. Draw flames as curved shapes above the wood. These shapes help create a lively campfire image.
Tree: Triangles And Lines
Use stacked triangles to draw pine trees. Draw a straight line for the tree trunk. Triangles get smaller as they go higher. This gives the tree a natural look and simple style.
Backpack: Rectangle And Circles
Draw a rectangle for the main bag. Add small circles for pockets and zippers. Use curved lines to shape the straps. These shapes make the backpack easy to sketch.
Drawing The Tent
Drawing a tent is a fun and simple way to start your camping sketch. It sets the scene and gives your drawing a clear focus. This step-by-step guide will help you create a basic tent shape that looks good and is easy to follow.
Focus on simple shapes first. The tent’s form is usually a triangle or a pyramid. Keep your lines light so you can adjust them as you go. This helps you build the tent outline quickly and neatly.
Sketching The Tent Outline
Begin with a large triangle for the front of the tent. This triangle shows the tent’s main face. Draw two lines coming down from the top point to make the sides. Connect these lines at the bottom with a straight line for the tent’s base.
Next, add a smaller triangle inside the first one. This shows the tent’s entrance. Keep the lines light and simple. The smaller triangle should sit near the bottom center of the big triangle.
Draw two straight lines from the top point to the ground behind the first triangle. These lines form the tent’s back. They give the tent a 3D look and depth.
Adding Tent Details
Start with the tent flap. Draw a curved line down the middle of the entrance triangle. This shows where the flap opens. Add small lines on the flap edges to suggest folds.
Sketch the tent poles by drawing thin vertical lines inside the tent. These lines help hold the tent’s shape. Add short horizontal lines to show ties or ropes.
Draw the ground under the tent with small, light strokes. It shows the tent sits on grass or dirt. You can also add simple shapes around the tent, like small rocks or bushes, for more detail.
Drawing The Campfire
Drawing a campfire adds warmth and life to your camping scene. It looks tricky but is simple with clear steps. Focus on basic shapes first. Build the campfire layer by layer for a neat look.
Creating The Fire Base
Start with a small circle or oval for the fire base. This shape holds the wood and flames. Draw short, thick lines inside the circle to show stacked logs. Use uneven shapes for logs to look natural. Add small cracks or texture lines on the wood. These details make the fire base more real. Keep the base wide enough for the flames to fit above.
Drawing Flames
Draw tall, curved shapes above the fire base for flames. Use smooth, pointed lines that flow upward. Flames should look like teardrops or leaves. Vary the size and shape of each flame for a lively effect. Add small inner flames inside bigger ones for depth. Shade the bottom of flames darker to show heat. Leave the tips lighter to show brightness. Flames do not have straight edges. Keep lines soft and wavy to show movement.
Adding Trees And Nature
Adding trees and nature to your camping drawing makes it feel alive. Trees give your picture depth and a sense of place. Simple shapes help you draw trees fast and clear. Nature elements like bushes and grass add detail and interest.
Simple Tree Shapes
Start with basic shapes like triangles and ovals. Use triangles for pine trees and ovals for broadleaf trees. Draw a straight line for the trunk. Keep shapes big and simple at first. This helps create the tree’s overall form quickly. You can add details later.
Adding Leaves And Texture
Use short, quick strokes for leaves. Draw small clusters instead of each leaf. This saves time and looks natural. Add lines on the trunk to show bark texture. Use light and dark shades to create shadows. This makes your trees look real and three-dimensional.
Credit: www.youtube.com
Incorporating Camping Gear
Incorporating camping gear into your drawing adds life and detail. It makes your camping scene more real and interesting. Start with simple shapes and build up the details step by step. Focus on one item at a time to keep it easy and fun.
Drawing A Backpack
Begin with a large oval for the main body of the backpack. Add two curved lines on top for the straps. Draw a smaller rectangle on the front for the pocket. Sketch lines to show zippers and stitching. Shade lightly to show depth and texture.
Adding A Lantern
Start with a small cylinder for the lantern’s body. Draw a circle on top for the light bulb area. Add a handle by sketching a curved line above the cylinder. Include small details like buttons or glass panels. Use shading to give it a rounded look.
Coloring Tips
Coloring your camping drawing brings it to life. It makes the picture bright and fun. Using simple tips helps you color better and enjoy the process more.
Choose colors that show nature well. Think of green trees, blue sky, and brown tents. Soft colors make your drawing calm. Bright colors make it lively.
Try to color lightly at first. You can add more color later. This way, you avoid mistakes and keep your drawing neat.
Use Light And Dark Shades
Adding light and dark shades gives your drawing depth. Shade the edges darker and the middle lighter. It makes objects look round and real.
Color Inside The Lines
Stay inside the lines for a clean look. Take your time and move your hand slowly. This helps your drawing look neat and clear.
Blend Colors Smoothly
Blend colors to avoid hard lines. Use small circles or light strokes. This creates smooth transitions and soft edges.
Choose The Right Coloring Tools
Use crayons, colored pencils, or markers. Each tool gives a different effect. Pick one that feels comfortable and easy to control.
Highlight Important Parts
Use bright colors on key objects like the tent or fire. It draws attention to the main parts. Keep the background colors soft and light.
Final Touches And Shading
Final touches and shading bring your camping drawing to life. They add depth and make the image feel real. Shading shows light and shadow, helping shapes stand out. Small details create a complete, finished look. Take your time with this step.
Choosing The Right Light Source
Decide where the light comes from in your drawing. This guides where shadows fall and where highlights appear. A clear light source keeps shading consistent. It helps viewers understand the form and space.
Applying Basic Shading Techniques
Start shading gently with a pencil or soft strokes. Use light pressure to create smooth transitions. Shade areas that are farther from the light darker. Leave parts closer to light bright. This contrast makes objects look three-dimensional.
Adding Texture And Details
Use small, careful lines to add texture. For example, rough bark on trees or soft grass. Vary your shading strokes to match different surfaces. Details make the drawing more interesting and realistic.
Blending For Smooth Effects
Blend shading softly using a finger or blending tool. This removes harsh lines and smooths shadows. Blending helps create a natural look. Avoid over-blending to keep some texture visible.
Highlighting Key Areas
Use an eraser to lift light spots for highlights. Highlight the campfire flames, shiny water, or bright leaves. Highlights add sparkle and focus. They balance the darker shaded areas.

Credit: easydrawingguides.com
Frequently Asked Questions
How Do I Start A Camping Drawing Step By Step?
Begin with simple shapes like triangles for tents and circles for trees. Add details gradually to build the scene. Follow the steps carefully to keep the drawing easy and clear. Use light pencil strokes for easy corrections.
What Tools Are Best For Easy Camping Drawings?
Use pencils, erasers, and fine-tip pens for outlines. Colored pencils or markers add vibrant colors. Keep tools simple to focus on step-by-step drawing. A good sketchbook or drawing paper enhances the experience.
Can Beginners Easily Draw Camping Scenes?
Yes, beginners can draw camping scenes by following step-by-step guides. Start with basic shapes and add details slowly. Practice improves skills and confidence. Easy camping drawings boost creativity and relaxation.
How To Add Nature Elements In Camping Drawings?
Include trees, mountains, rivers, and animals using simple shapes. Add texture with lines for grass or water. Nature elements enrich the camping scene and make it realistic. Keep details minimal for easy drawing.
Conclusion
Drawing camping scenes can be fun and simple. Follow each step with care and patience. Practice often to improve your skills quickly. Use basic shapes to build your drawing first. Add details little by little for a clear picture. Enjoy the process and don’t rush it.
Keep trying even if your first drawing isn’t perfect. Soon, you will create drawings you feel proud of. Grab your pencil and start your camping art today!