Frustrated with this monotonous schedule of day-to-day life and looking for something refreshing?
What else could be better than camping out in the wild, when you have some free time after so long!
Camping is surely fun when you are fully prepared and you know the required skills that are mandatory.
And one of the most important skills that you must learn before heading towards your campsite is pitching your tent the right way.
A well-pitched tent works as great protection against adverse weather conditions and is pretty much necessary for a comfortable night’s sleep.
So, how to pitch a tent perfectly?
Well, in this article we will show you step by step process of how to do it so that you can practice it at home before you finally sail for your next camping trip.
Things To Ensure Before Pitching Your Tent
Before you start pitching your tent, there are some prerequisite tasks that you have to complete first in order to make it work perfectly.
Make sure you don’t forget to follow the below instructions prior to your final tent pitching activity.
Note: If you already know this or just want to know the process, jump to the pitching up section.
#1. Choose Your Tent Wisely
First things first, you need to pick up the right kind of tent for your need depending on the type of your adventure.
Since the market is flooded with options and each option is made for a specific purpose, you have to have a good idea about what kind of tent will suit your requirements the most.
In terms of a short day-long festival, you don’t even need proper tents that need to be pitched. You can just use pop-up tents that don’t even require pitching, rather you can just assemble them in 10 seconds.
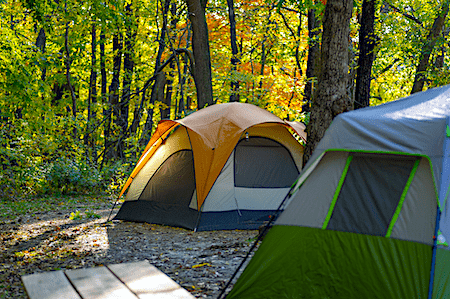
But if you are moving towards a campsite to stay for a few days and you need strong protection against weather adversities, then you should go for standard tents.
Now, standard tents come in different sizes and shapes addressing the specific needs of campers. You can pick a 1, 2, 4, or even 18-person tent depending on the number of campers you will have with you.
If your camping place is somewhere around the hills or mountains, it’s best to take a one-person tent or highest 2-person tent because they will be much lighter to carry up to the hill.
In case of a family trip with kids, you should go for a big family tent that usually comes with separate multiple sleeping compartments and loads of space for easy movement inside.
However, you can also look into air tents which are inflatable and an easy alternative to traditional tents.
Yes, I can sense your worries about the strength of air tents against rough wind and stormy weather, but these types of tents are improving with time and most certainly they can be picked over other types for a good family trip.
Additionally, try to choose a tent that is super easy to set up.
#2. Check Your Tent Closely Before Sailing
You definitely don’t want to face that awkward situation where you start pitching your tent after reaching the campsite and you see there’s nasty wear and tear in your tent.
So, it’s a mandatory task to check your tent closely before you even step out of your house for your campsite.
Whether you are preparing to bring an old tent or just bought a new one for the next trip, you must check and double-check if everything is alright.
Otherwise, your whole camping fun is going to be ruined for such a silly mistake!
#3. Have A Good Read Of The Instruction Manual
Many of us don’t like to read the instruction manual before using any product these days.
But you shouldn’t ignore the instruction manual before pitching up a tent because it may lead to disastrous situations.
No matter how many times you have set up a tent before, it’s always recommended to go through the instruction so that you exactly know what you are doing and if it’s the right way to do it.
Reading and knowing the instruction may keep you ahead among fellow campers as you will be able to impress them easily by putting up the tent smoothly and quickly.
So, have a good read!
#4. Practice At Home
Without practically learning how to pitch a tent, you shouldn’t sail for your next camping trip.
If you are a newbie in this field and you don’t know what could be the potential odds of setting up a tent right on the campsite, then things can get really awful.
When you don’t have enough prior practice, you may end up pitching the tent the wrong way and mess things up.
There’s a saying- ‘Practice makes a man perfect. Once you pick up the right tent and you have already inspected that there’s no wear and tear, now it’s time for you to practice setting up the tent right near your house.
You can practice this skill of tent pitching in your garden or over an open private place before you try on any mountain summit or on any public campsite.
This will help you figure out what are the potential problems you may face when you try to pitch your tent on your desired campsite.
You will also get a good idea about using guy ropes, even the exact number of pegs and poles you may require.
So, boost up your confidence first by practicing setting up your tent before you finally sail towards your campsite.
#5. Take Help From Fellow Campers
Unless you are camping solo, you shouldn’t try pitching your tent alone. It can be a time-consuming task, especially when the tent is big enough for several campers.
So, don’t take the whole burden on your shoulder, rather bring some more shoulders to carry out the task together.
If you are with a group of friends or family, let them give you their hands while you approach to set up the tent.
#6. Select The Right Ground Surface
This is one of the most important decisions you have to make before you finally start pitching your tent at the campsite.
You cannot randomly pick any place because you need to ensure a proper night’s sleep without having the worry of any potential disturbance.
Make sure you pick a place that is free from the disturbance of railway lines, busy roads, security lights, generators, and other nearby campers.
However, on some campsites, there are separate places for groups, families, and even solo campers.
Way it is important to know where to set up your tent, it is also important to know where you shouldn’t camp at all.
-
Try To Find A Flat Ground
Try your best to find out a flat, even ground where you can comfortably pitch your tent. Because, compared to uneven surfaces, flat ones make it much easier for you to put up your tent.
In case you are putting your tent on a slope, at least try to make the door face downhill or in the direction of the wind.
This will help you against rainwater coming in and also from being hit by a strong wind.
Or, you can also align your tent with a slope gradient for a comfortable night’s sleep.
-
Don’t Put Your Tent Under A Tree
You may easily get tempted to pitch your tent under a tree, but that’s a wrong move!
In this case, rainwater will annoy you with loud dripping fall and even tree sap can cause potential risks of getting stuck.
To add more to its dramatic consequence, you never know when a thunderstorm hits the tree and you end up being the victim!
So, you should never pick a place under a tree, that’s what you need to take seriously.
-
Avoid Wet Surfaces
It’s always recommended not to pitch your tent on marshy, wet ground.
Not only it will make your tent pitching task more difficult, but also it will welcome groundwater to slide in.
In most cases, the bottom parts of hills are problematic, since groundwater or rainwater flows down and stays there.
Also, try to avoid places where you can see big animal droppings and signs of wild animals around. This is pretty much necessary for your safety.
And you definitely don’t want your camping trip getting ruined by such awkward experiences. So, choose your camping ground wisely.
#7. Clean The Camping Area
Theoretically, you must have decided on your camping ground by now.
The next thing you need to do before you start pitching your tent is to clear the whole area where you are going to do it.
Make sure you clear out all the dirt and debris from the place; ensuring nothing is there that can damage the tent anyway.
This cleaning includes removing stones, sticks, rocks, branches of trees and previously used tent pegs as well.
If you bring a small broom or rake in your car, this may help you well with the clearing process.
Things You Need to Pitch a Tent
These are the tools you need to pitch a tent:
- A footprint or tarp piece
- A groundsheet
- A tent (lol that’s obvious!)
- Tent Poles
- A rainfly
- Stakes or Pegs
- A rock or mallet
Let’s Pitch Your Tent Perfectly

Now as you know about all the prerequisite tasks that you have to complete and ensure before you finally start pitching your tent, you are ready to go through step by step process of it.
Let’s start.
#1. Open The Tent Parts And Necessary Tools
First of all, unpack your tent and all the required tools that are necessary to pitch the tent as mentioned above.
If there’s a clear sky, lay down all the parts and tools on the ground to check out if everything necessary is there or not.
However, in terms of adverse weather conditions, you have to make sure that the tent body is not getting wet somehow and other lighter parts are secured enough against the rough wind.
#2. Put The Ground Sheet In Position
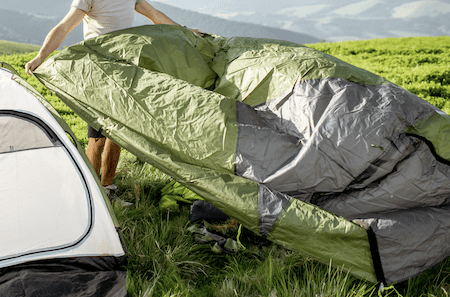
The next thing you need to do is to put the groundsheet according to your desired position.
This sheet is basically waterproof and enhances the longevity of the tent floor. Lay it down in a way that it doesn’t get snagged on little rocks or stones, which may welcome water through its tears.
Once you are done laying down the groundsheet in the right place, now it’s time to place the body of the tent on its footprints.
Close the windows and doors with zips and make sure the door is not facing the direction of the wind.
In some modern-day tents, you will find the groundsheet as a part of the tent itself. In that case, you just simply need to lay it down.
#3. Assemble The Poles
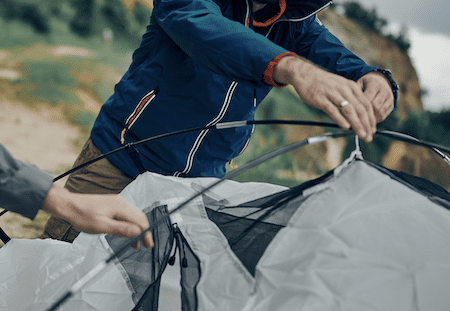
Poles are the skeleton of a tent and assembling them is not a difficult task either.
Poles these days are usually made of elastic cord and fiberglass material. Due to this build material, it gets much easier to match the poles and assemble them than before.
Once you start setting up the poles, try to figure out the connection between each pole and tent body where they can be connected accordingly.
In order to join them together, aluminum ferrules are there around joints where you have to slot the segments.
But you have to be careful not to damage or snap the poles in the process.
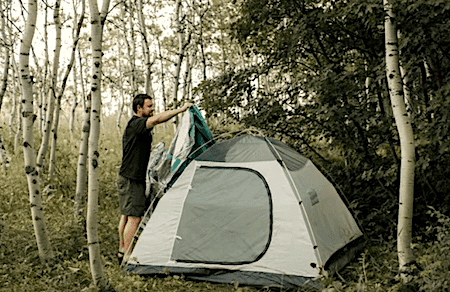
#4. Connect The Poles And Raise The Tent
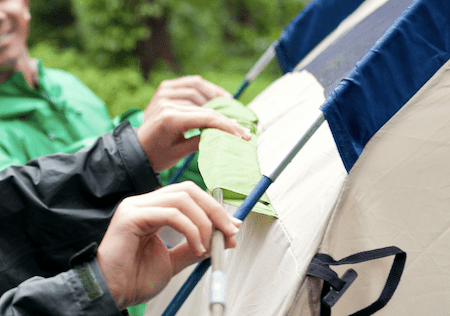
When you are done putting the poles together, then you have to attach these poles to the body of the tent.
In some tents, you will find sleeves through which you can slip the poles and form a frame. On the contrary, other tents come with hooks; they are easily attachable both ways.
While performing this, don’t be in a hurry, otherwise, that may cause snagging or piercing of your tent material.
So, you have successfully attached the poles, now you can raise the tent high by bending the tent poles and securing them.
At each corner, you will find loops where you can secure the poles.
#5. Put The Rain Fly Over The Tent And Secure It
You are out in the wild, you never know when the weather bats an eye and heavy raindrops fall over your tent and everything gets messed up!
So, definitely, you need a rainfly to protect you against adverse weather conditions.
However, most tents usually come with a rainfly or you can make a rainfly or at least a waterproof outer for such needs.
Now, cover the body of the tent with a rainfly that will keep it dry inside. It will also help the materials to have air pockets in between for good insulation.
Once you are done covering the tent with your rainfly, you have to secure it with a given securing system or clips based on your tent type.
#6. Stake Out Your Tent
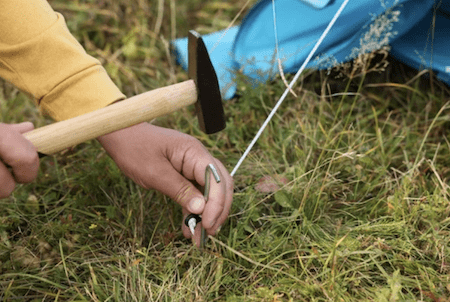
The next thing you need to do is to stake out your tent the right way to make it secure. Most tents these days have stakes that are good enough for soft surfaces (like grass).
But, if your ground surface is not soft, then you may need specialized stakes to pitch your tent on such surfaces (such as sand, snow, or gravel).
Start with the corners and stake out them perfectly before you attach them with the guy ropes. 4 corners of the tent need to be pegged with a rubber mallet.
Make sure each peg is having an angle of 45 degrees while you do it against the ground. This will make the tent taut and secure enough.
In case, you don’t have any stake mallet, you can also use flat stone for the purpose.
In the meantime, using a stake saver may also help you to save the stone from damaging the pegs or stakes.
If you run out of tent pegs somehow, hard sticks can work as a great substitute for a while.
Also, make sure you know how to secure a tent without stakes in case you forget to bring the stakes.
#7. Attach The Guy Lines
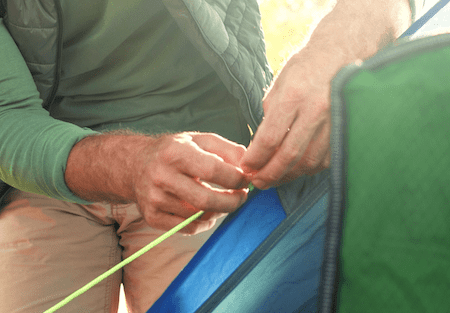
With each tent, there comes guy ropes or lines to make the tent stable against wind or rough weather.
After you are done staking out the tent, you have to attach the guy ropes to sturdy loops according to your strategic locations.
Though attaching guy lines isn’t a mandatory thing when there’s no bad weather condition, still, you can do it as a pre-safety preparation, as you never know when the mood of the weather changes rapidly.
#8. Tighten The Guy Lines If Needed
You are almost done, but hey! You should check the whole setup properly and find out if any loose guy ropes are making it vulnerable.
If found, tighten it and secure the whole tent including the rain fly as well.
If you are using a separate groundsheet, then you should check the bottom of it if there are any exposed edges.
In that case, just tuck in that exposed part under the floor and thus you can prevent forming water and sliding into your tent out of your concern if it rains.
However, don’t make everything so tight that there’s no room for windy conditions.
So, finally, you have pitched your tent perfectly if you have followed all these instructions carefully.
Practice these steps somewhere near your house and be a pro at pitching a tent with time.
How To Set Up A Tent In Sand
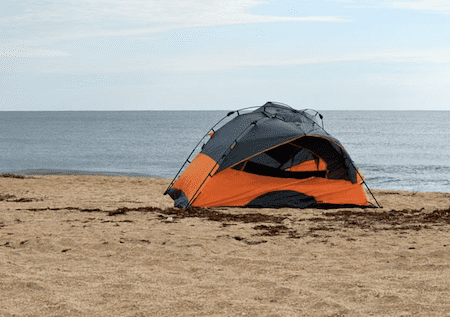
Up to this point of our discussion, we have talked about step by step process of pitching a tent on regular terrain.
But, when you decide to camp in an area full of sand, then there are differences you have to consider in the whole process of it.
Let’s get to know about them:
- Try to bring 14-18 cm best sand stakes with the tent.
- Carry stuff sacks or dry bags so that they can be used as sandbags.
- Make the ground even with your feet.
- Peg the corners of the tent and place rocks on each peg-top.
- The entrance should be facing downwind so that sand there’s no sand being blown inside the tent when there’s rough wind.
- Fill up the dry bags or sacks with sand and place them on each guy line, guy out, grommet and make them taut.
Pitching A Tent In Snow
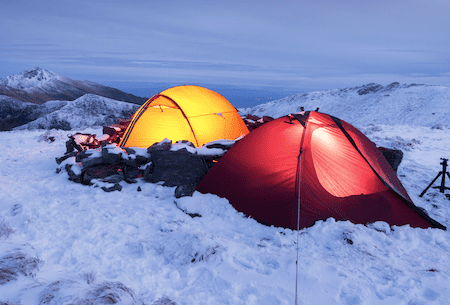
If you are planning to camp in a snow land, then you have to take care of a few things extra:
- You have to invest in stakes that are made for snow.
- You need a groundsheet that is comparatively thicker. This will minimize the heat loss and keep the surface warm as you need.
- The pitching spot should be facing east to get the warmth of the morning sun earlier. The spot should be surrounded by trees, boulders, scrub, and hillocks. But don’t pick a spot under a tree branch that is snow-laden.
- Also, remember not to pick a spot that has any connection with the route of avalanche-prone slopes.
- Stake out the guy lines as perfectly as you can. You can also use dry bags to make them more secure.
How To Put A Tent In Bad Weather
What if the moment you reach the campsite, the very moment weather gets gloomy all of a sudden?
Things you should do in such a scenario:
- Use your car as a shelter against the wind while pitching up the tent.
- Bring waterproof clothes with you and wear them when you set up the tent. The moment you are done pitching put them in a plastic bag.
- Try to set the rain fly first before you pitch the inner body to have better protection.
- Don’t neglect to put the guy lines and pegs, since they will make your tent stable enough against bad weather.
Final Words
So finally, we have come to an end.
Throughout the whole discussion, we tried our best to give you a comprehensive idea of how to pitch a tent from all possible aspects.
If you follow our guide properly, you can simply master this very skill of pitching a tent in no time.
Be an expert in this fundamental skill of camping and make a great impression on your fellow campers.
Have a great adventure!